Quickstart Guide
Create and publish your first AI-powered campaign with Firebuzz
This guide walks you through creating your first campaign from scratch. You'll go from sign-up to a live landing page in under 5 minutes using AI-powered tools.
Prerequisites
- A website URL or brand description (for AI to analyze)
- A credit card (no charges until trial ends)
- 5 minutes of your time
Step 1: Sign Up & Let AI Build Your Workspace
Firebuzz's AI will analyze your brand and set up your workspace automatically.
- Go to app.getfirebuzz.com and sign up
- After signing up, you'll see the welcome screen with two options:
- Create a new workspace - Start fresh with your own workspace
- Join an existing workspace - Accept an invitation from your team
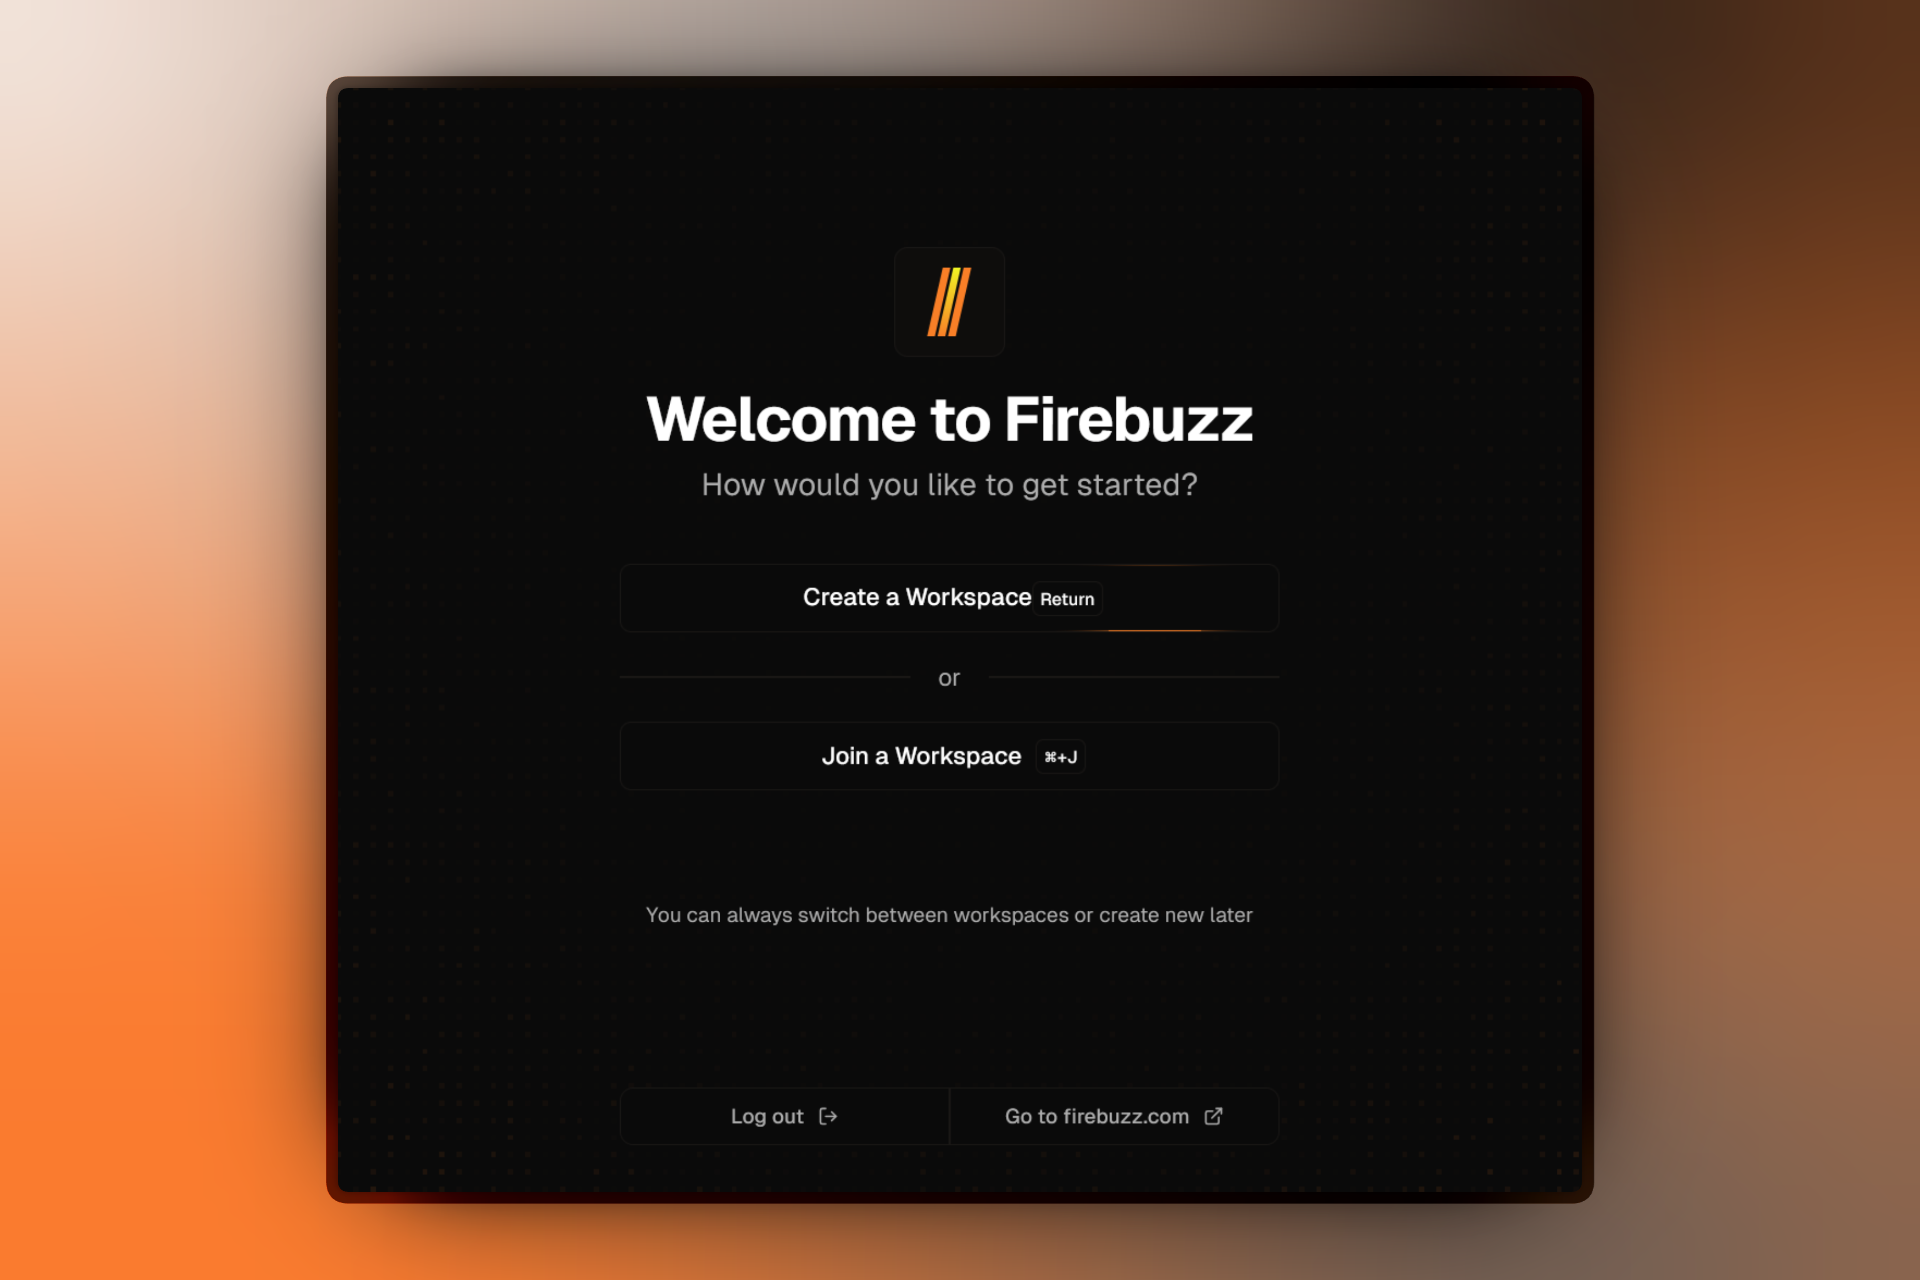
- Choose Create a new workspace to get started
- Enter your website URL or describe your brand
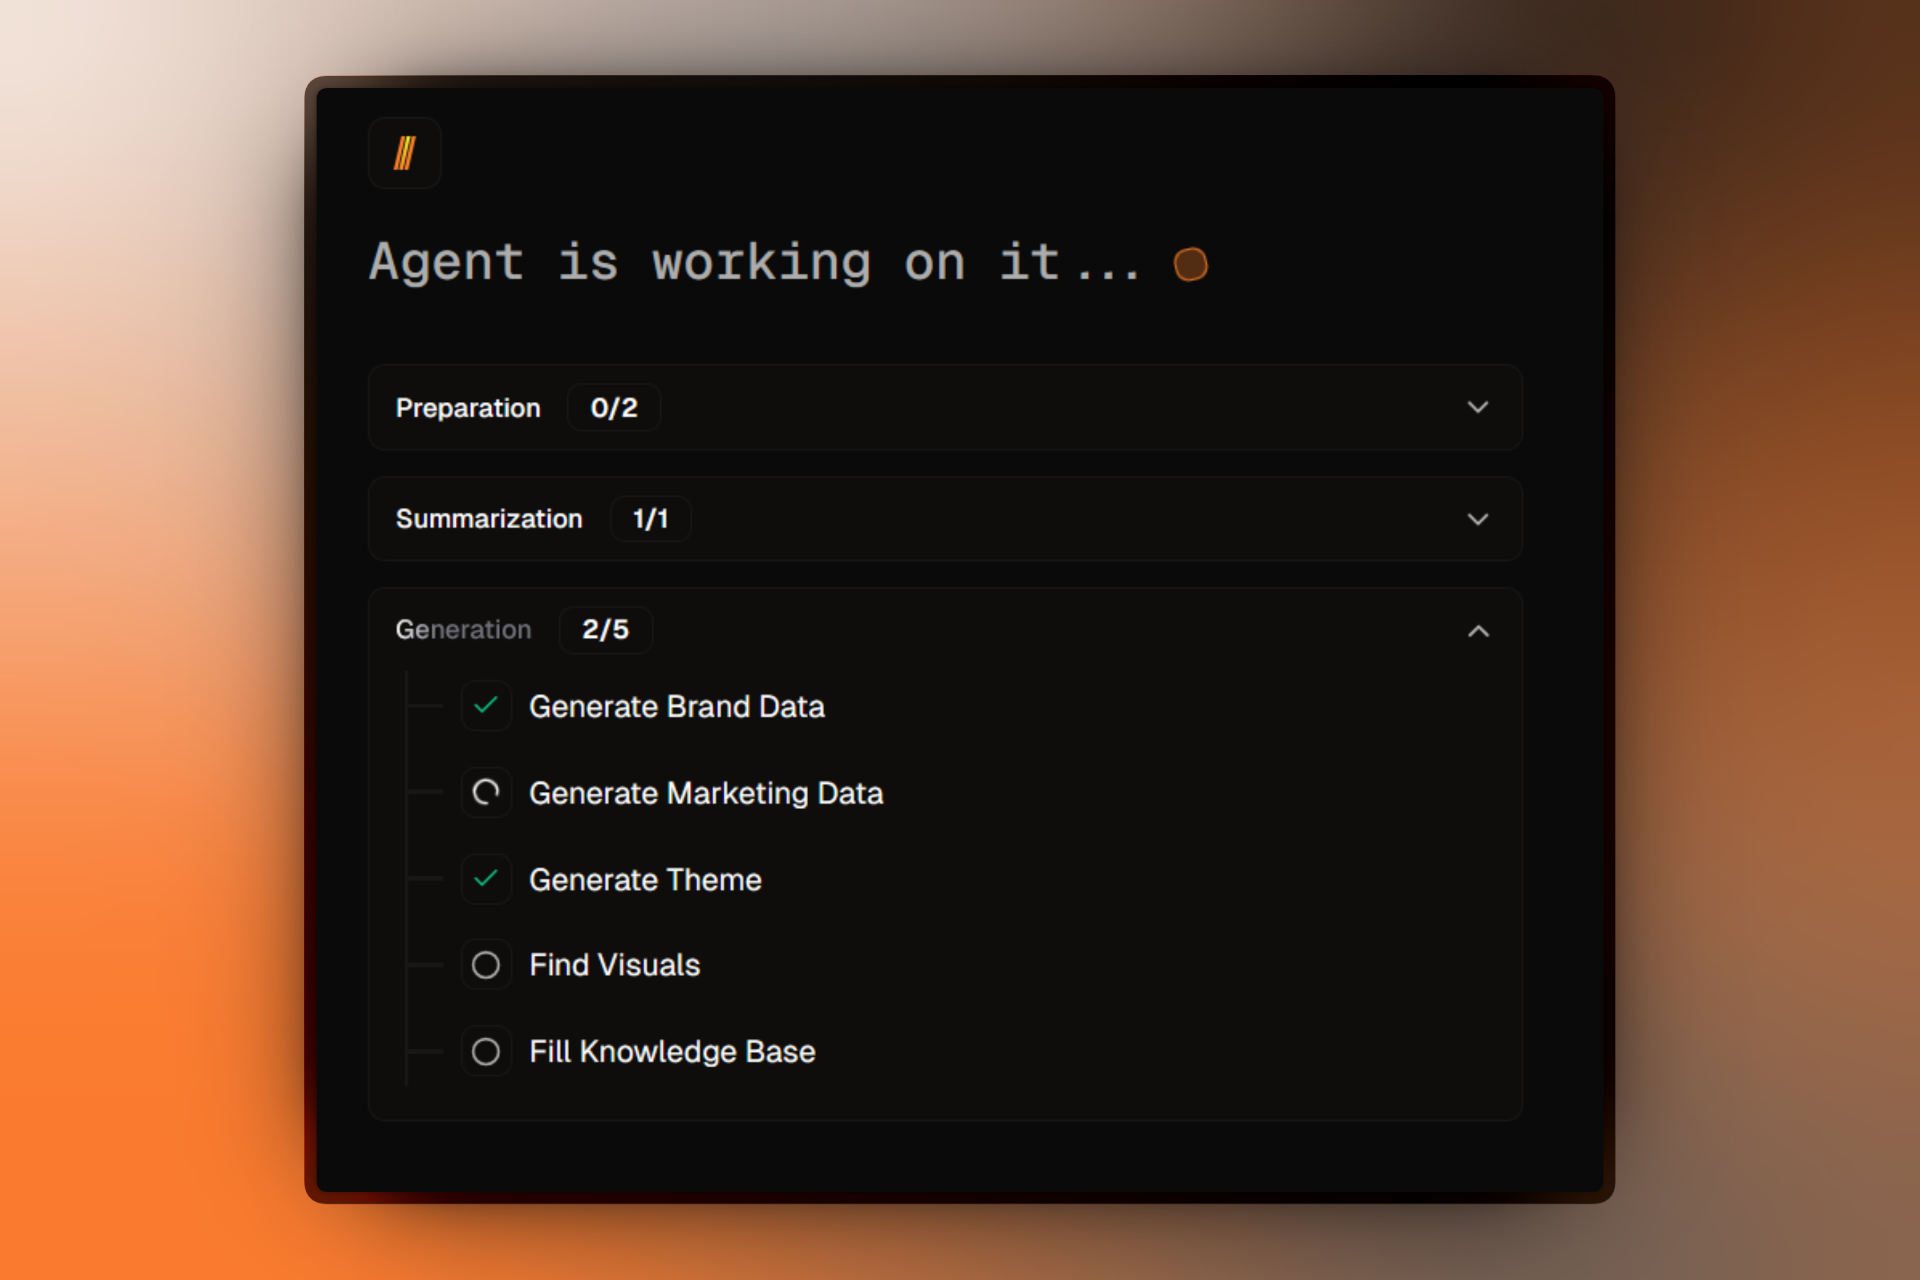
- Watch AI work its magic - you'll see real-time progress organized in task groups:
- Preparation - Initial setup tasks
- Summarization - Brand analysis tasks
- Generation - Content generation tasks
- Payment - Final setup tasks
Each task group shows completion status (e.g., "3/5 completed") and individual task progress with checkmarks and timing.
Powered by AI: Firebuzz analyzes your website or description to automatically generate brand colors, copy templates, and campaign suggestions. Learn more about AI →
Step 2: Select Your Plan & Start Free Trial
After workspace setup, you'll automatically see the plan selection screen. Choose your plan to start your 14-day free trial.
- Review the available plans (toggle between Monthly and Yearly pricing):
- Pro - For individuals and small teams
- Scale - For growing marketing teams (Most Popular)
- Agency - For agencies and enterprises
- Each plan card displays a "Free for 14 days" badge - your trial starts automatically when you select a plan
- Click on your preferred plan card to proceed to checkout
- Complete payment setup (you won't be charged during the trial period)
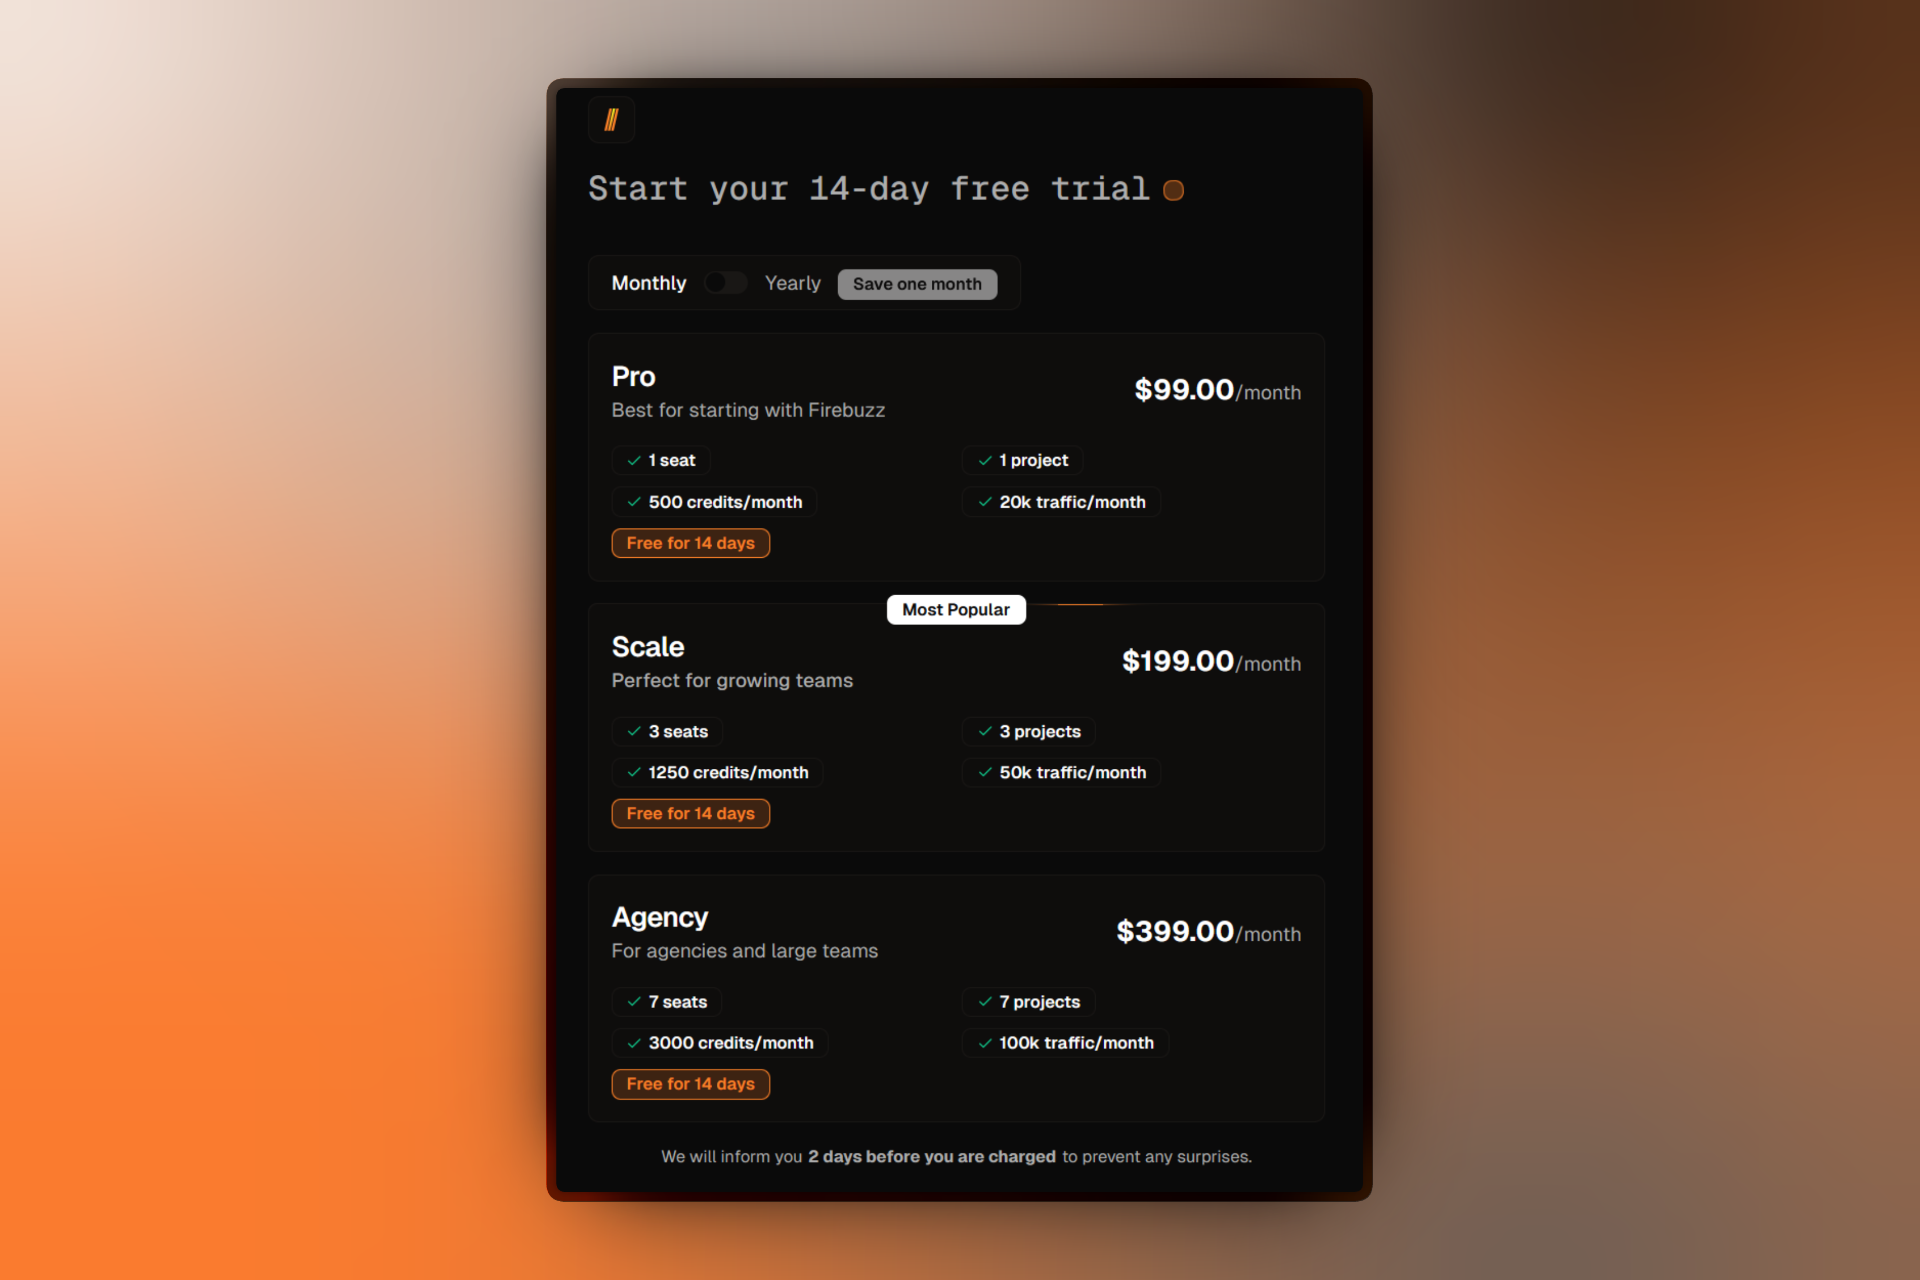
Trial Protection: We'll notify you 2 days before your trial ends to prevent any surprises. You can cancel anytime during the trial period with no charges. View pricing details →
What's a Workspace? Your workspace is where your team collaborates on campaigns and projects. It's auto-configured with your brand settings. Learn more →
Step 3: Create Your First Campaign
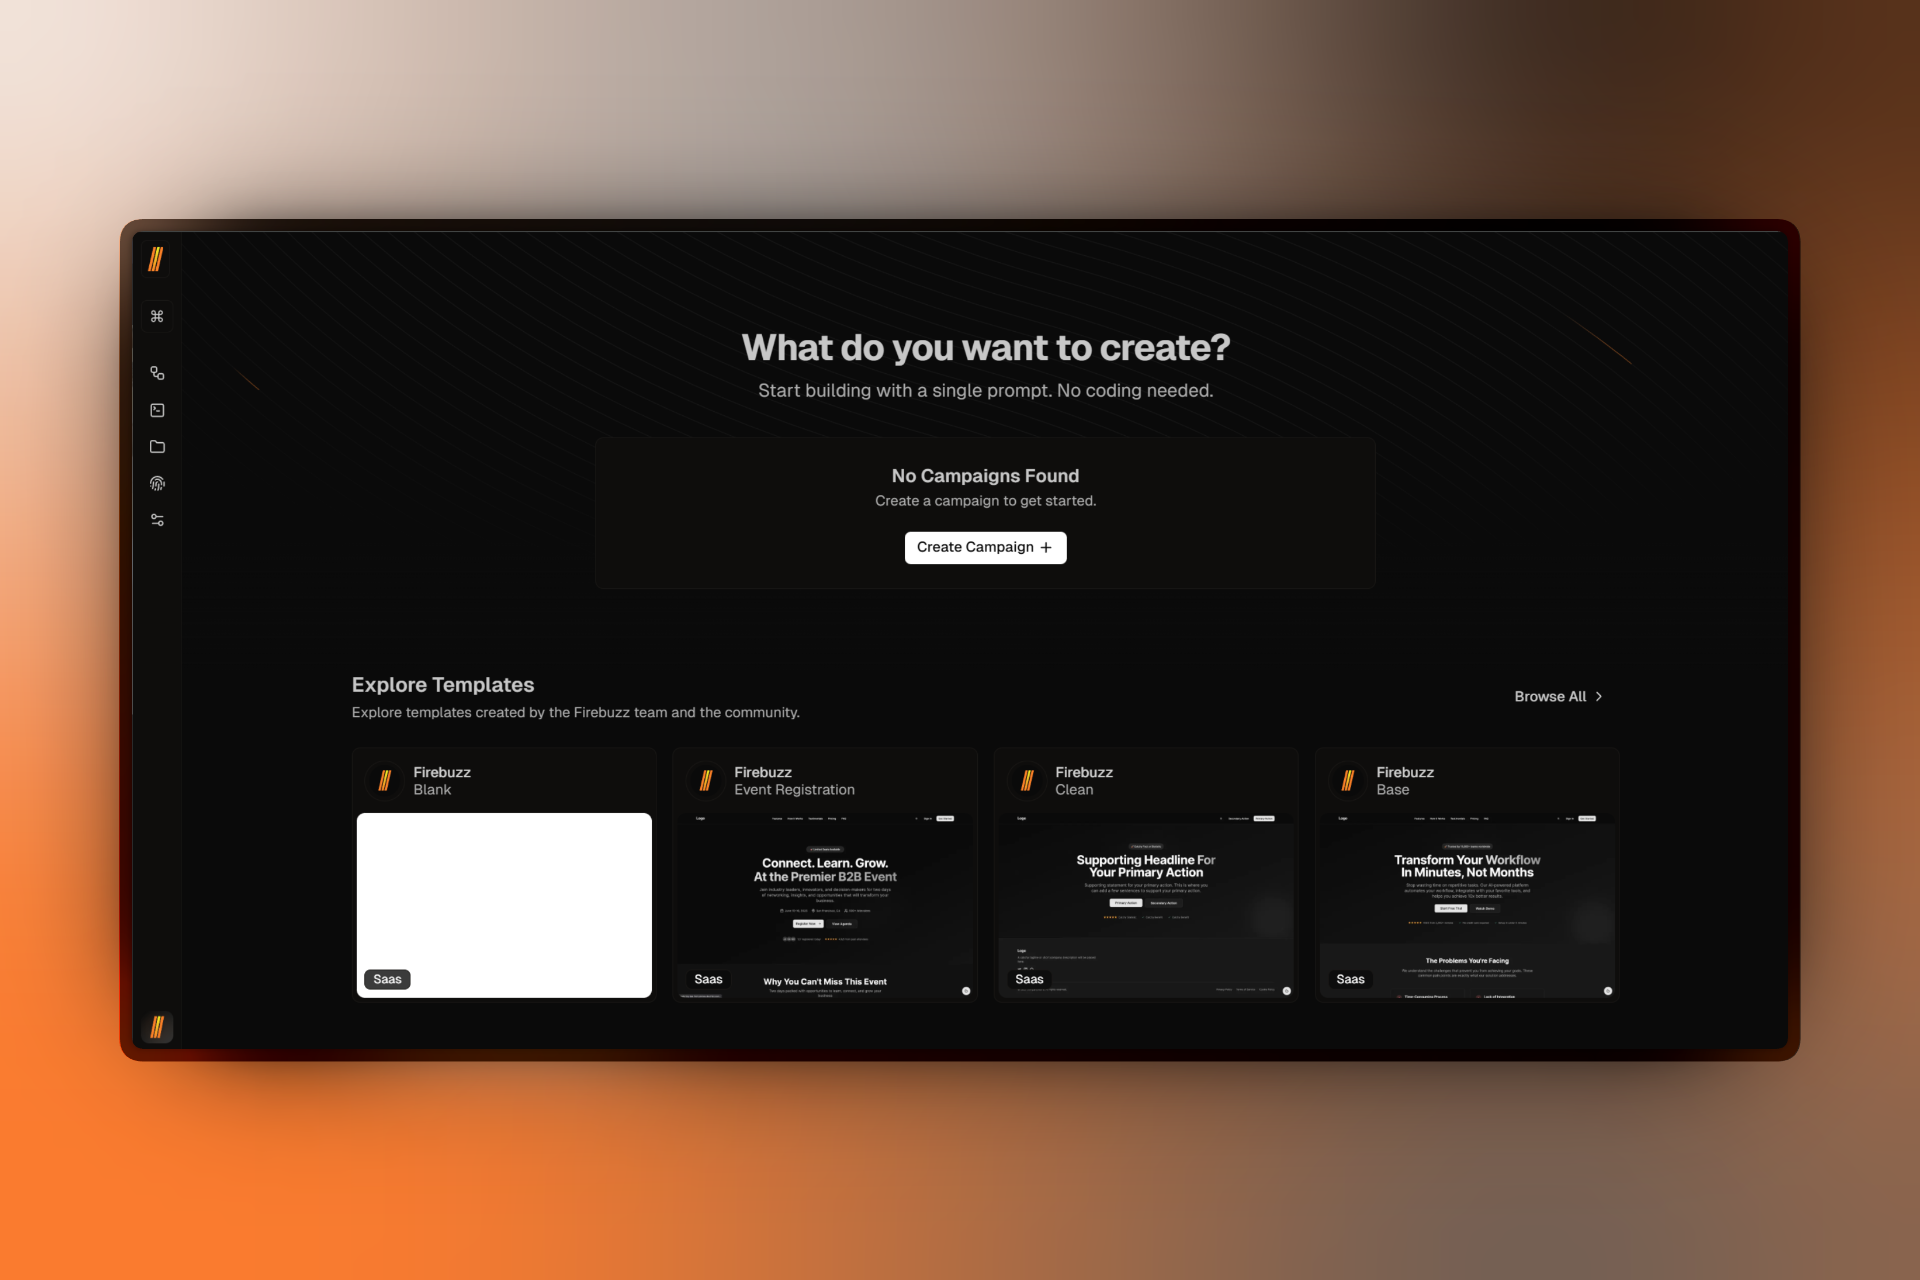
After workspace setup completes, you'll see the dashboard with an empty state prompting you to create your first campaign.
- You'll see "No Campaigns Found" with a message: "Create a campaign to get started"
- Click the Create Campaign button
- In the campaign creation modal, fill out the form:
- Title:
- Slug: (auto-generated from title)
- Description:
- Campaign Type: Choose between two types:
- Lead Generation - Collect leads from your landing page
- Click Through - Redirect users to a specific URL
- Primary Language: English
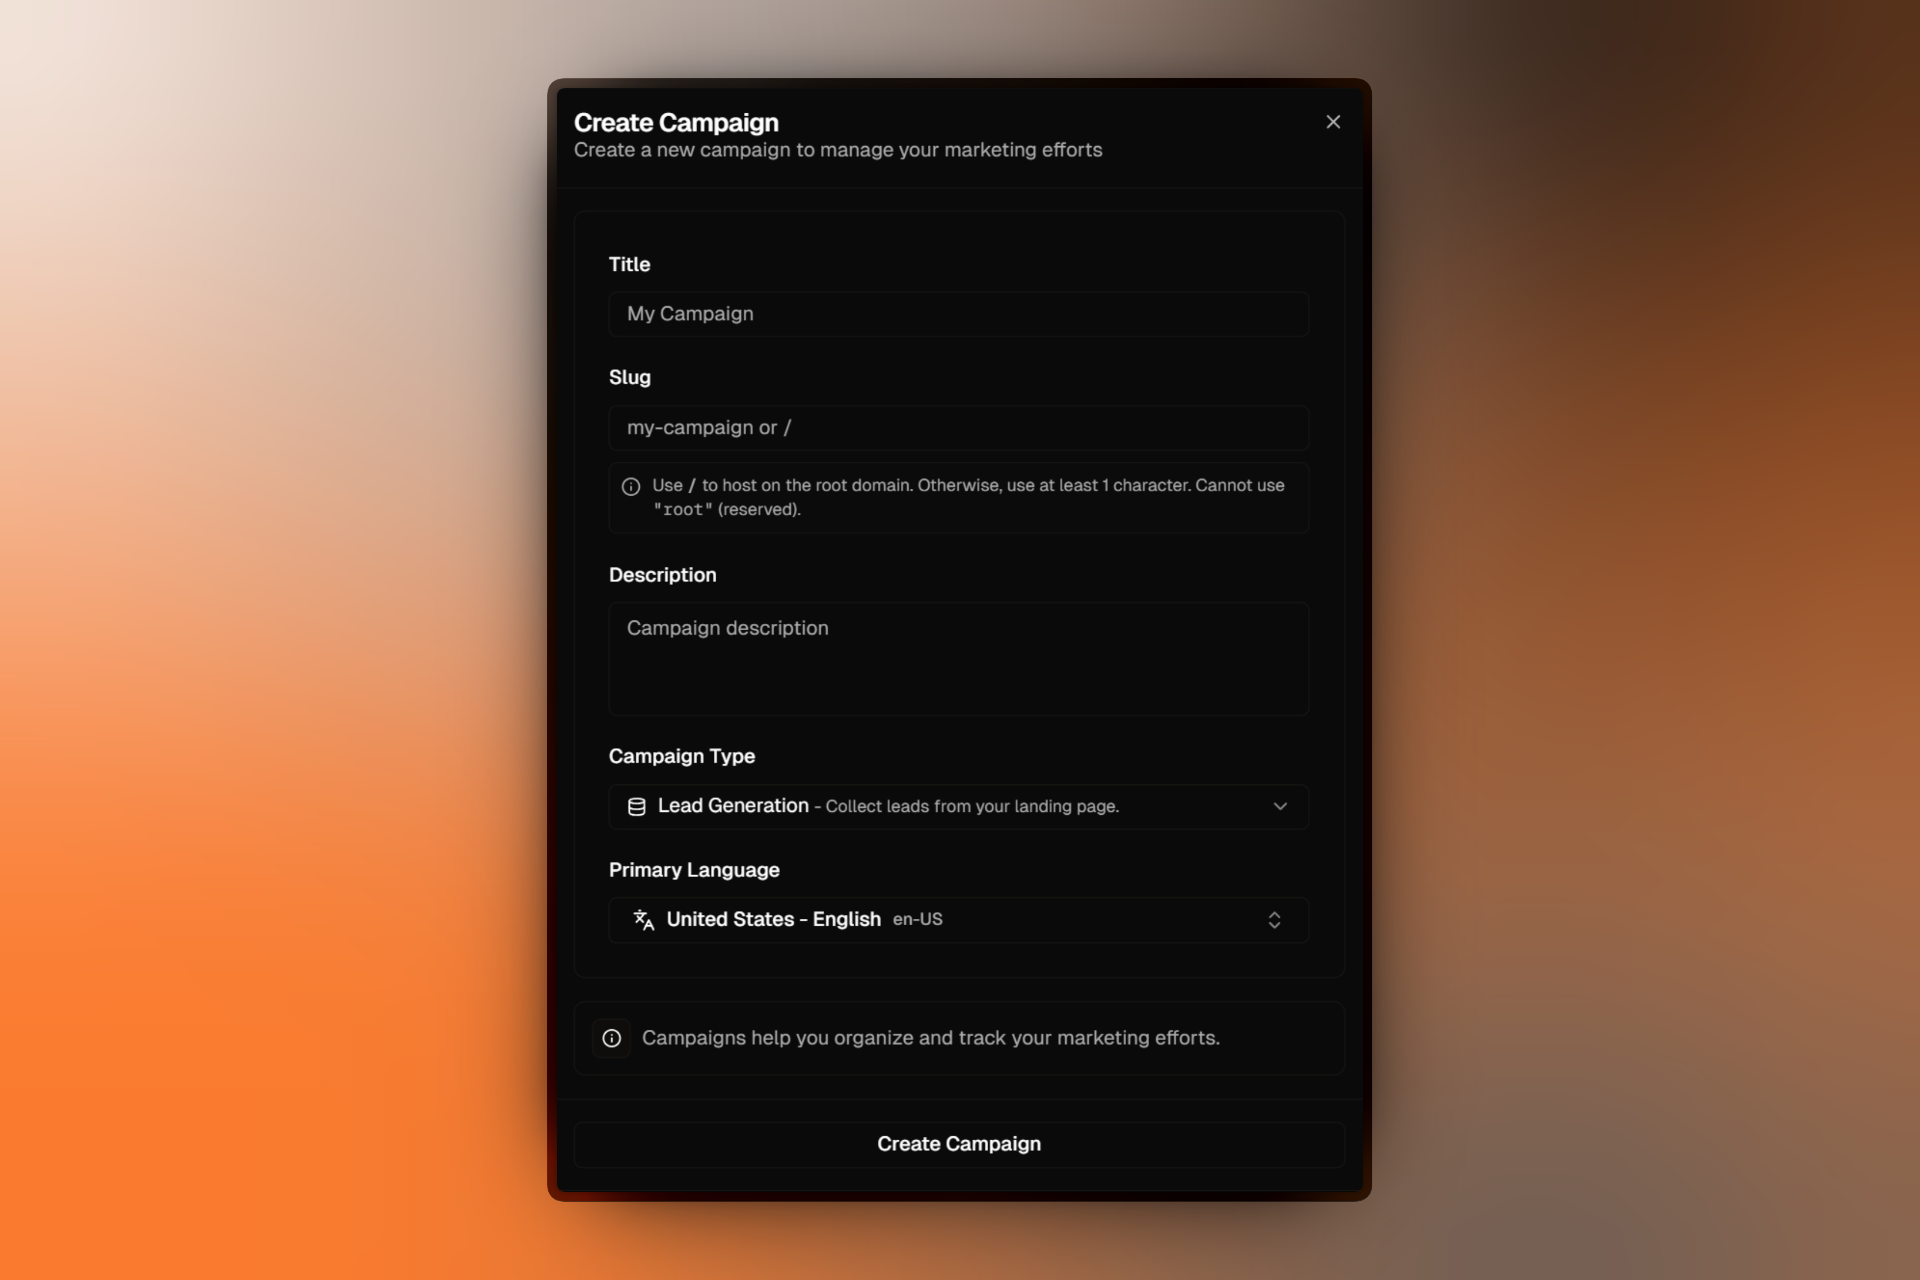
- Click Create Campaign to create your campaign
You'll be redirected to your new campaign's flow builder where you can configure targeting rules and settings.
What's a Campaign? Campaigns organize your landing pages, forms, and audience targeting rules. Think of them as folders for related marketing efforts. Learn more →
Projects organize campaigns: Your first project was auto-created during workspace setup. You can create more projects to organize campaigns by client, product line, or marketing initiative. Learn more →
Step 4: Build Your Landing Page with AI
After creating your campaign, you'll be automatically redirected to the campaign flow builder. This is where you'll create your first landing page.
Create Your Landing Page
- In the campaign flow builder, look at the Traffic section (default landing page area)
- Next to the landing page dropdown, click the small button to create a new landing page
- In the landing page creation modal, fill out the form:
- Title:
- Description:
- Campaign: Auto-selected (your current campaign)
- Template: Choose from the visual template slider (e.g., "Base", "Clean", "Event", "Blank")
- Theme: Select your brand theme (auto-populated from workspace)
- Primary Language: English
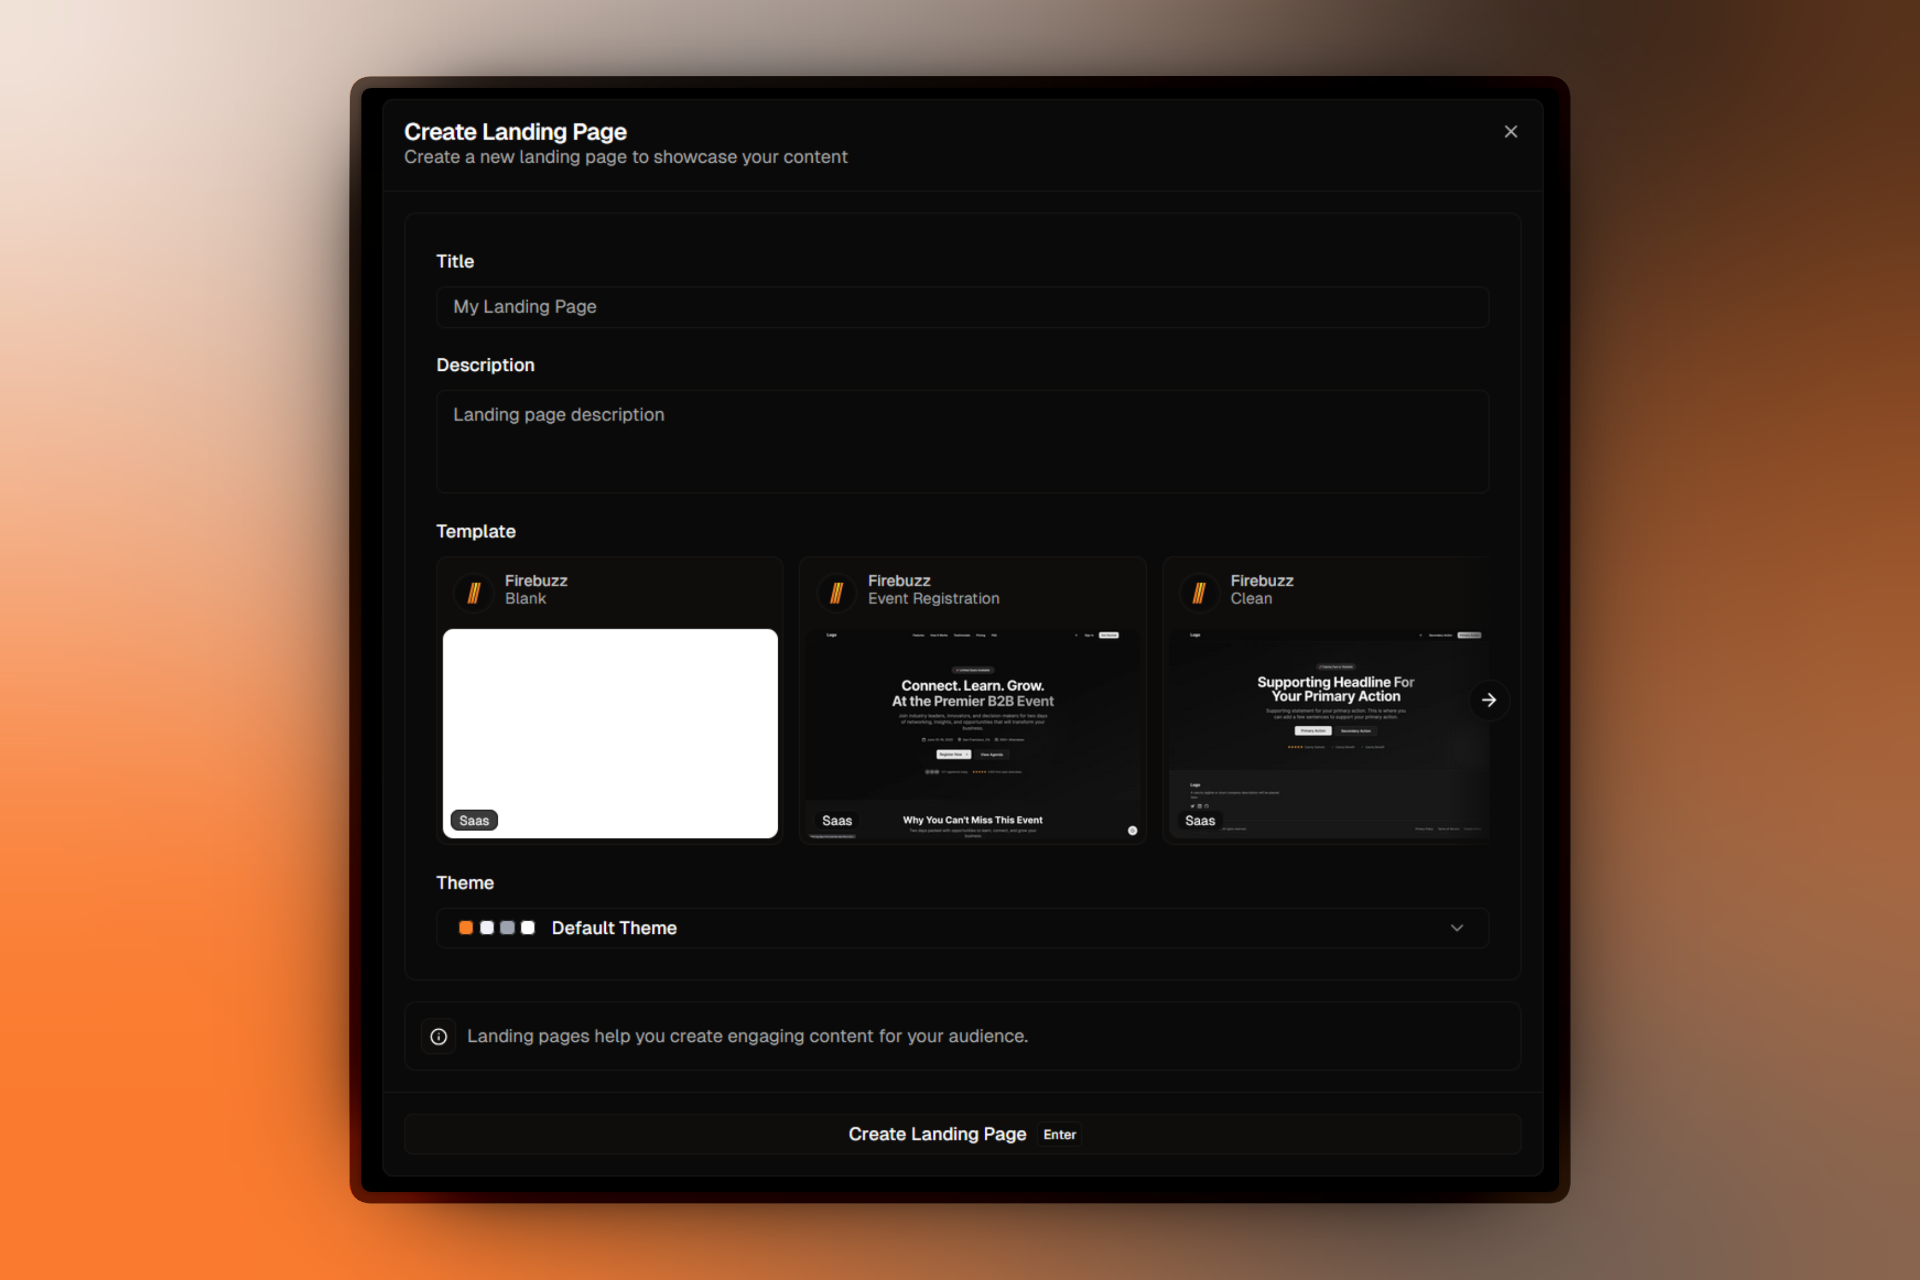
- Click Create Landing Page
While creating: Creating...
After creation, you'll be redirected to the AI-powered page builder.
Use the AI Builder
The AI Builder has a split-screen layout with two panels:
- Left Panel: Chat with AI to make changes (e.g., "Add a hero section with a CTA button")
- Right Panel: Live preview of your page (switch between Desktop/Mobile views using the device toggle)

Try asking the AI to:
- "Add a hero section with a bold headline"
- "Change the primary color to blue"
- "Add a contact form with email and phone fields"
- "Make the CTA button more prominent"
AI-Powered Builder: No coding required. Describe what you want, and AI updates your page instantly. You can also use the version history tab to undo changes. Learn more →
Step 5: Configure Your Domain
Choose how users will access your landing page.
- Navigate to Brand → Domains in the sidebar
- Choose your domain option:
- Firebuzz Subdomain (instant, no setup required)
- Format:
yourproject.frbzz.com - Perfect for testing and quick launches
- Format:
- Custom Domain (requires DNS configuration)
- Use your own domain like
promo.yourcompany.com - Follow our domain setup guide →
- Use your own domain like
- Firebuzz Subdomain (instant, no setup required)
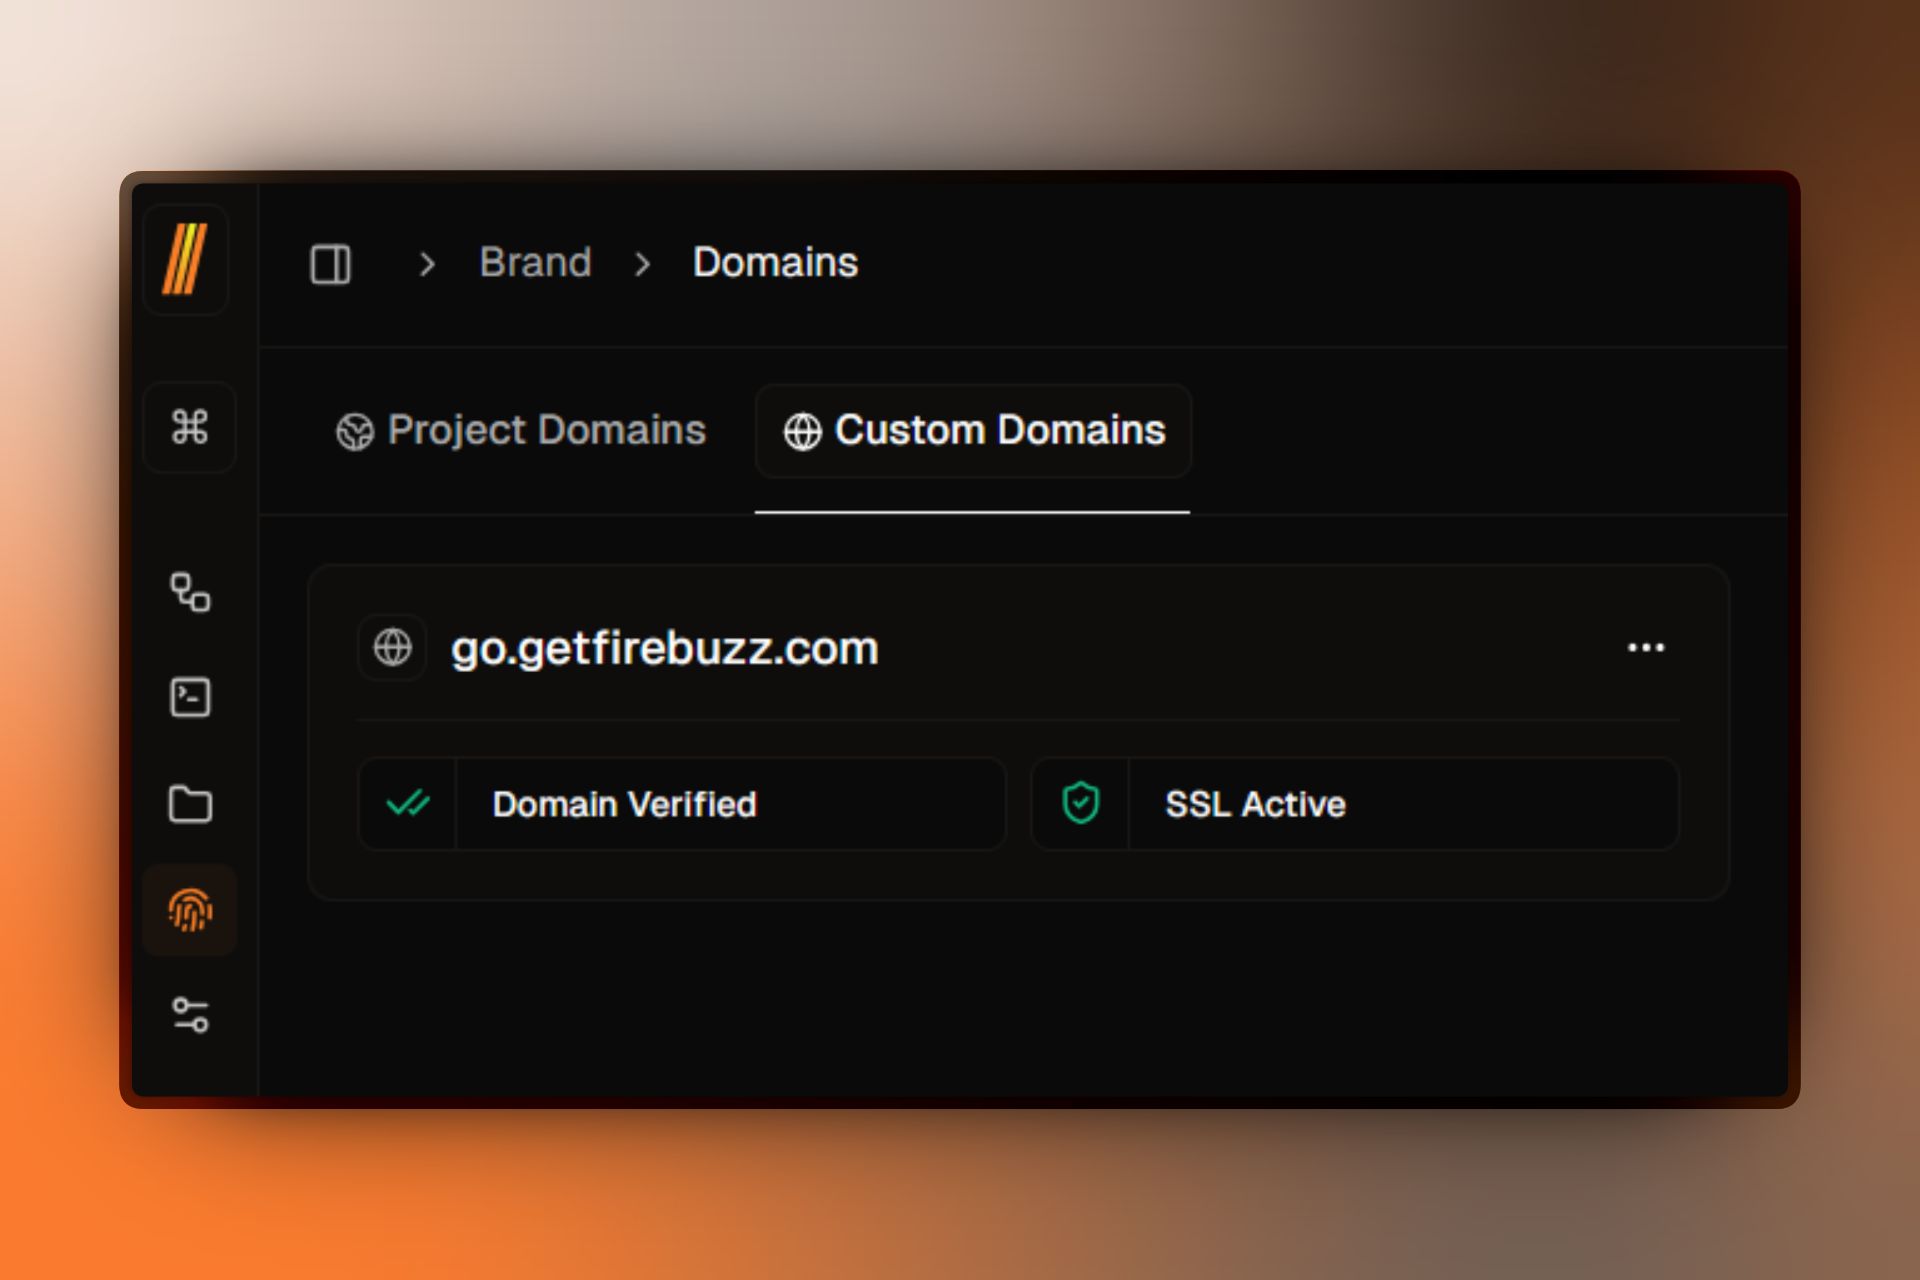
Instant Setup: Firebuzz subdomains work immediately. Custom domains require DNS verification (usually takes 5-10 minutes). Learn more →
Step 6: Publish Your Campaign
Go live in one click!
- Return to your campaign (navigate to Campaign in the sidebar)
- Click the status dropdown in the top-right corner showing Draft
- In the dropdown menu, click Publish to Preview to test first
- After testing preview, click Publish Now to go live
Congratulations! Your campaign status is now Published and live!
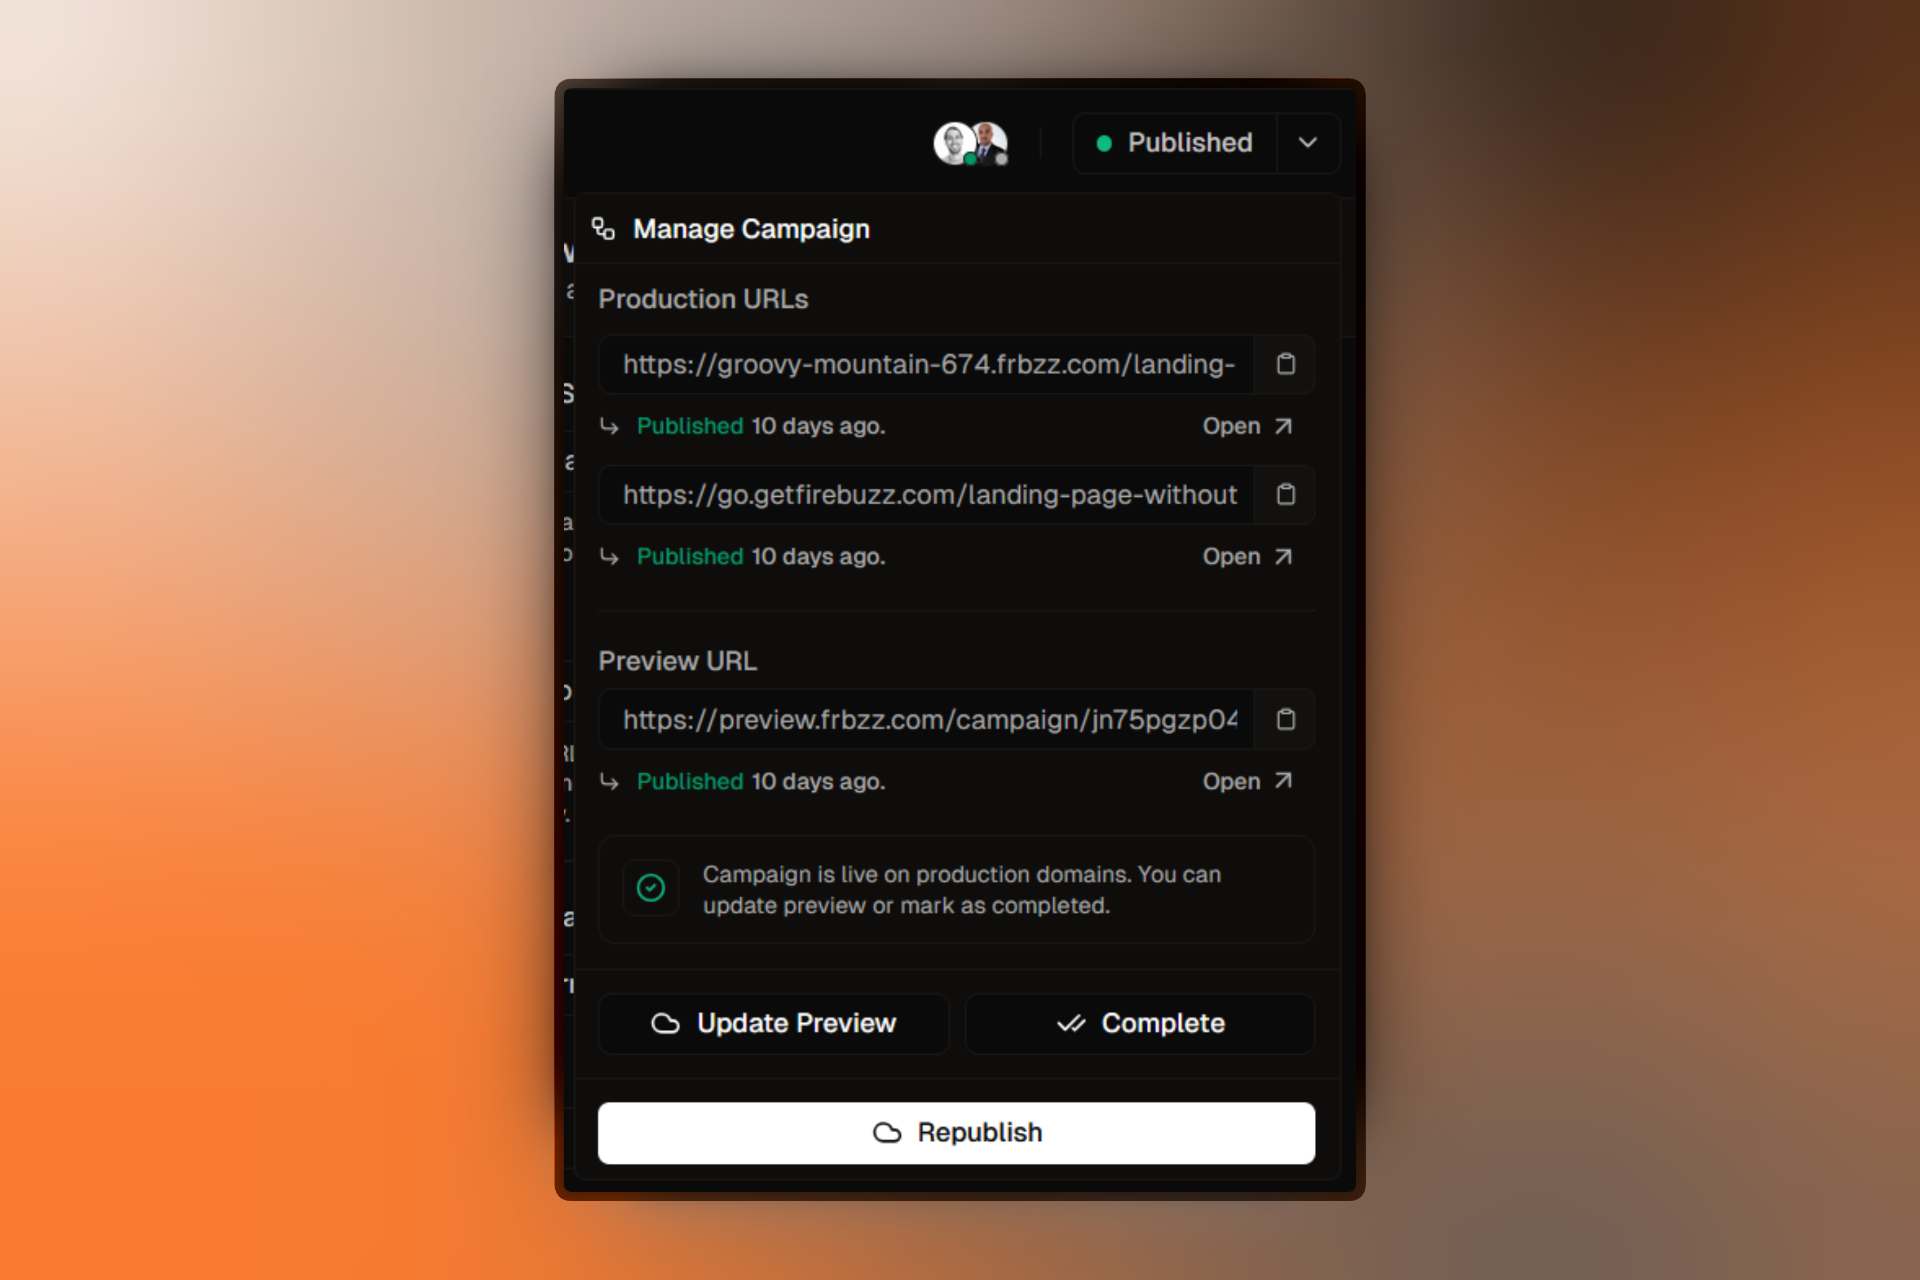
Your landing page is now accessible at:
yourproject.frbzz.com/your-campaign-slug(if using Firebuzz subdomain)yourdomain.com/your-campaign-slug(if using custom domain)
What's Next?
Now that your campaign is live, supercharge it with these features:
View Real-Time Analytics
Track visitors, conversions, and engagement in real-time
Create A/B Tests
Test different page versions to optimize conversions
Set Up Integrations
Connect your CRM, email marketing, and analytics tools
Invite Team Members
Collaborate with your marketing team
Connect Custom Domain
Use your own domain for branded landing pages
Explore AI Features
Discover advanced AI capabilities for campaign optimization
FAQ
Troubleshooting
Having issues? Check these resources:
- AI Generation Errors - AI not responding or failing to generate content
- Campaign Publishing Issues - Campaign won't publish or go live
- Domain Connection Problems - Custom domain setup issues
- Login & Access Issues - Can't sign in or access your workspace
For all troubleshooting topics, visit the Troubleshooting hub.
Related Resources
- Interface Overview - Get familiar with the dashboard
- Core Concepts - Understand workspaces, campaigns, and projects
- AI Best Practices - Get the most out of AI features
- Campaign Flow Builder - Master advanced campaign configuration
- Visual Page Builder - Learn all builder features