Project Settings
Edit project details or delete projects from your workspace settings.
Manage your projects from the workspace settings area. You can edit project names, colors, and icons, or permanently delete projects you no longer need.
Accessing Project Settings
- Go to Settings.
- Select the Workspace tab.
- Click the Projects section.
You'll see a list of all projects in your workspace. Each project card displays:
- The project's icon and color
- The project name
- The workspace name
- A Current badge if it's your active project
- An actions menu (three dots)

Editing a Project
You can update a project's title, color, or icon at any time:
- Locate the project you want to edit.
- Click the (three dots) button.
- Select Edit Project.
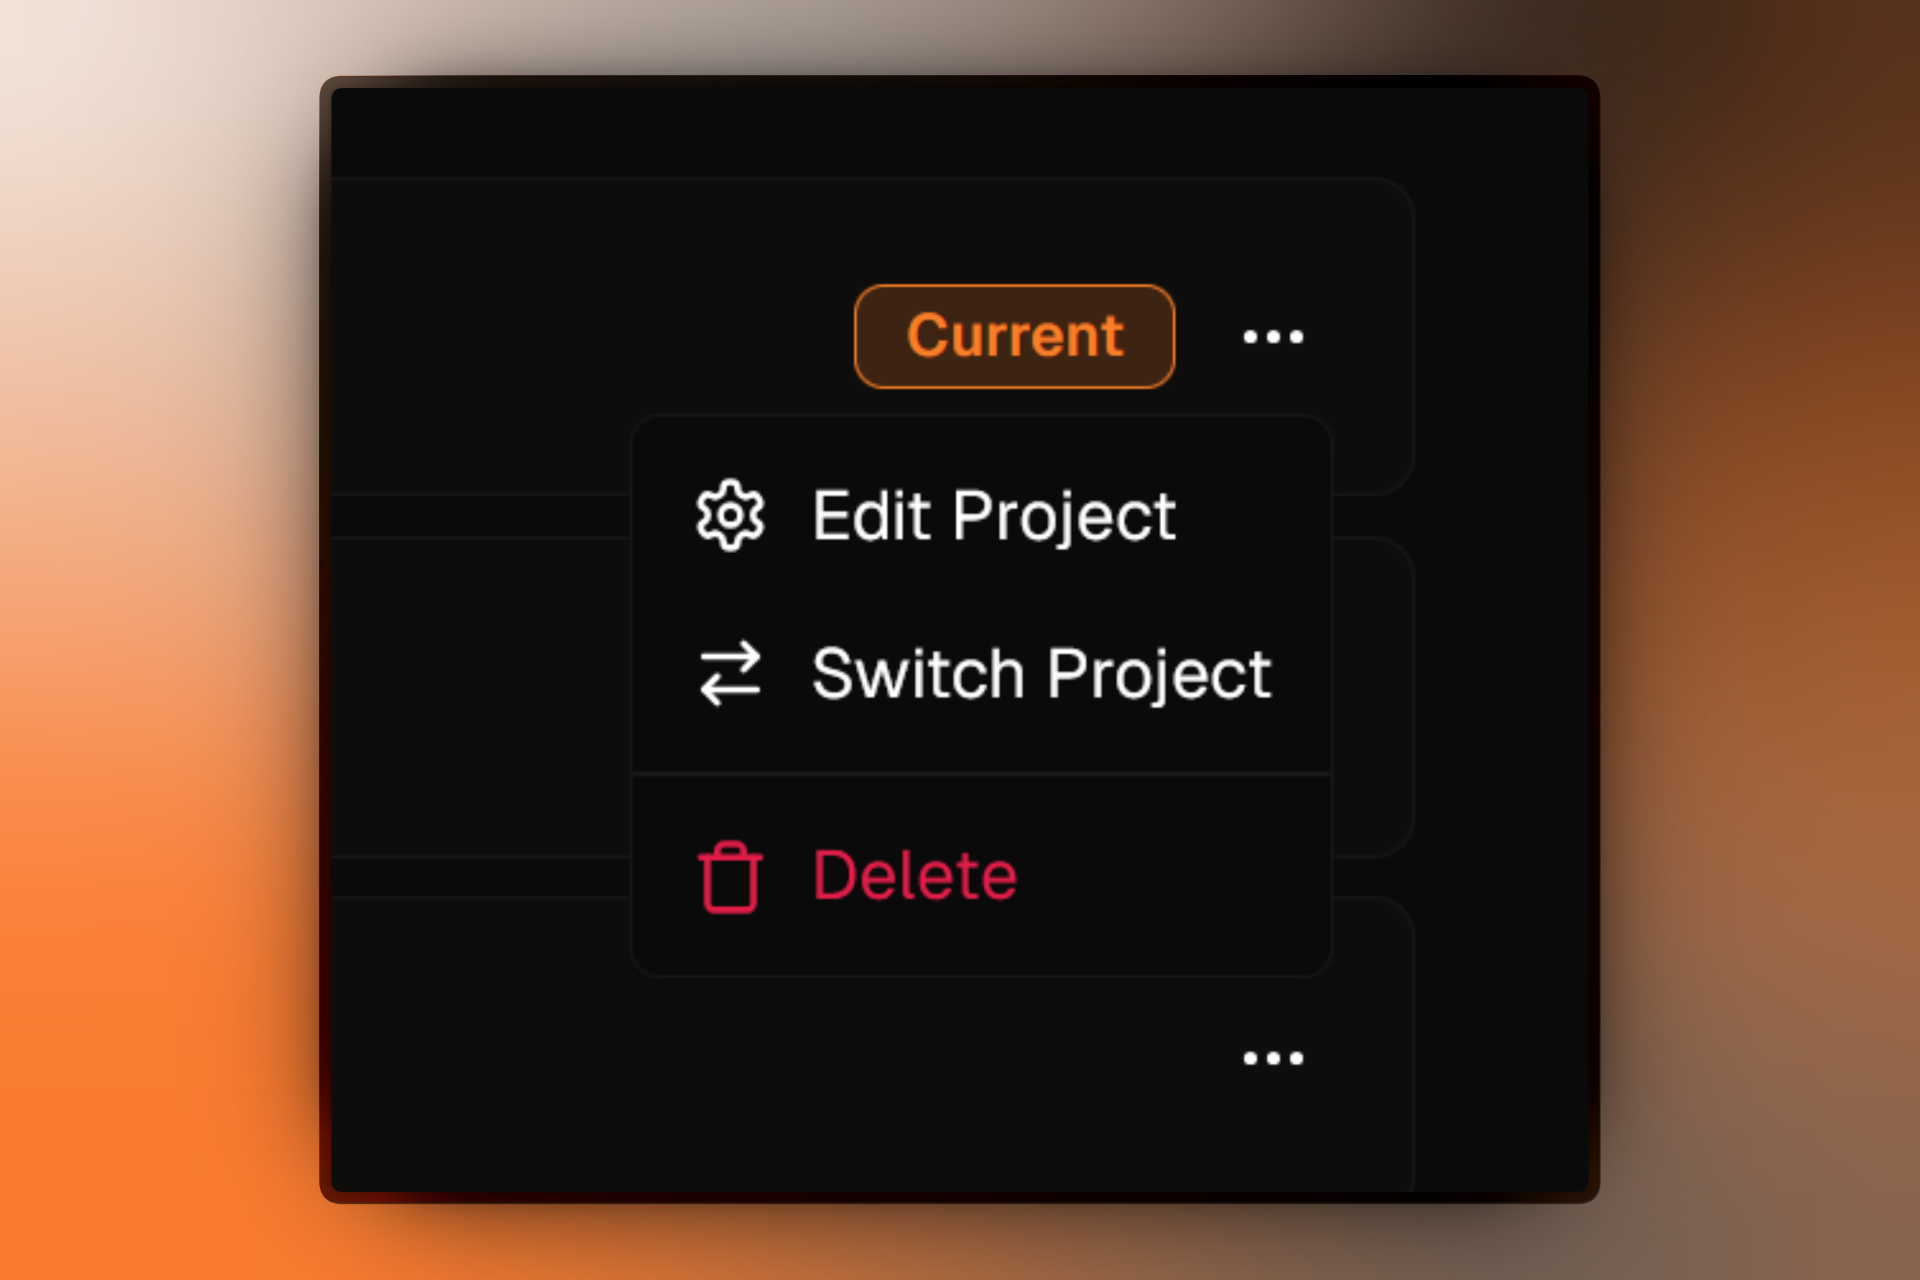
- Update the Title, Color, or Icon as needed.
- Click Update Project.
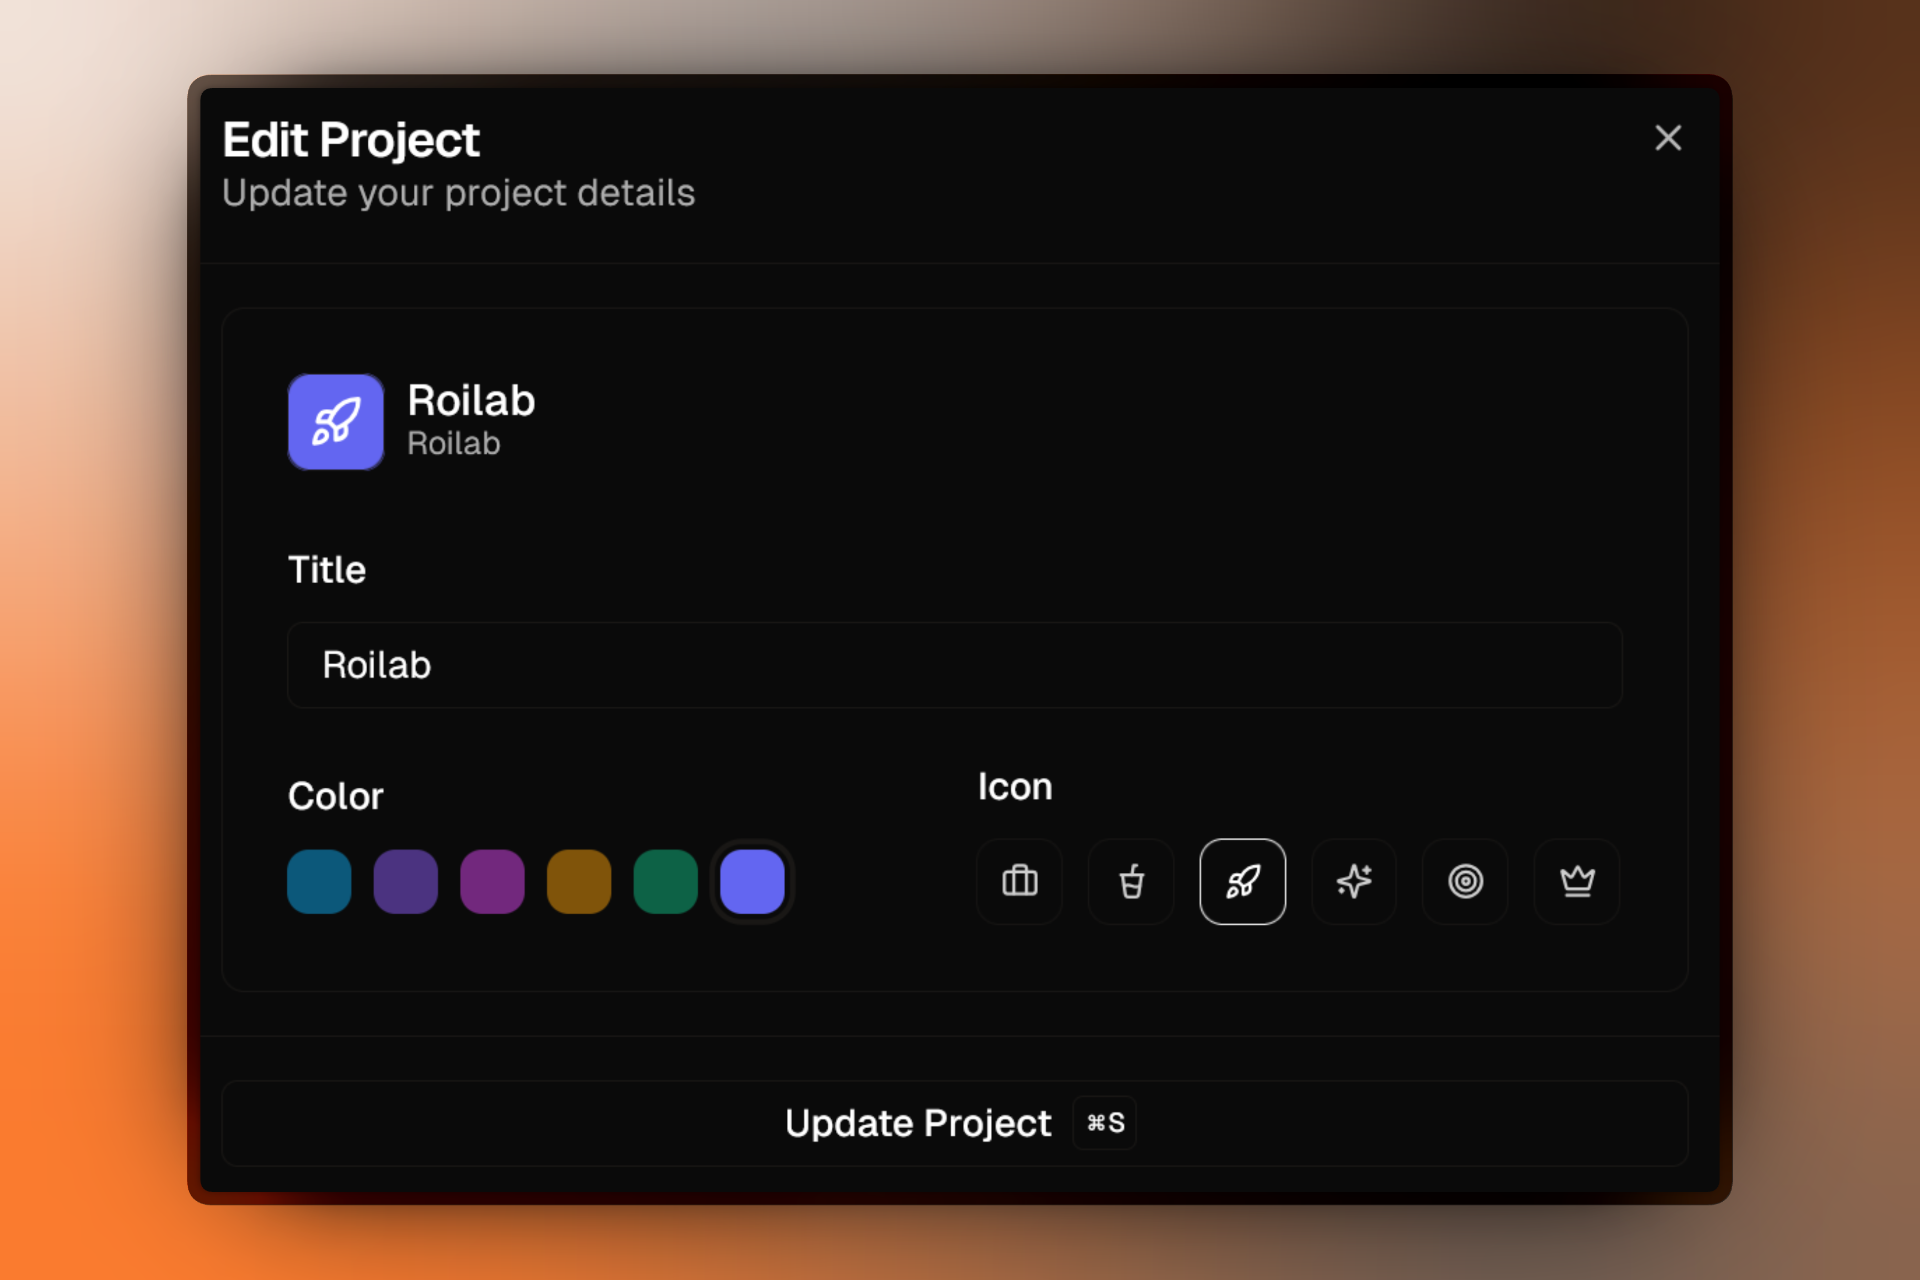
Changes are saved immediately and will be reflected across your workspace.
Switching to a Project
From the projects list, you can also switch to any project:
- Click the button on the project card.
- Select Switch Project.
You'll be redirected to the selected project's dashboard.
Deleting a Project
If you no longer need a project, you can permanently delete it.
Deleting a project is irreversible. All campaigns, landing pages, and associated data will be permanently removed. This action cannot be undone.
- Locate the project you want to delete.
- Click the button.
- Select Delete (shown in red).
- In the confirmation dialog, click Delete Project.
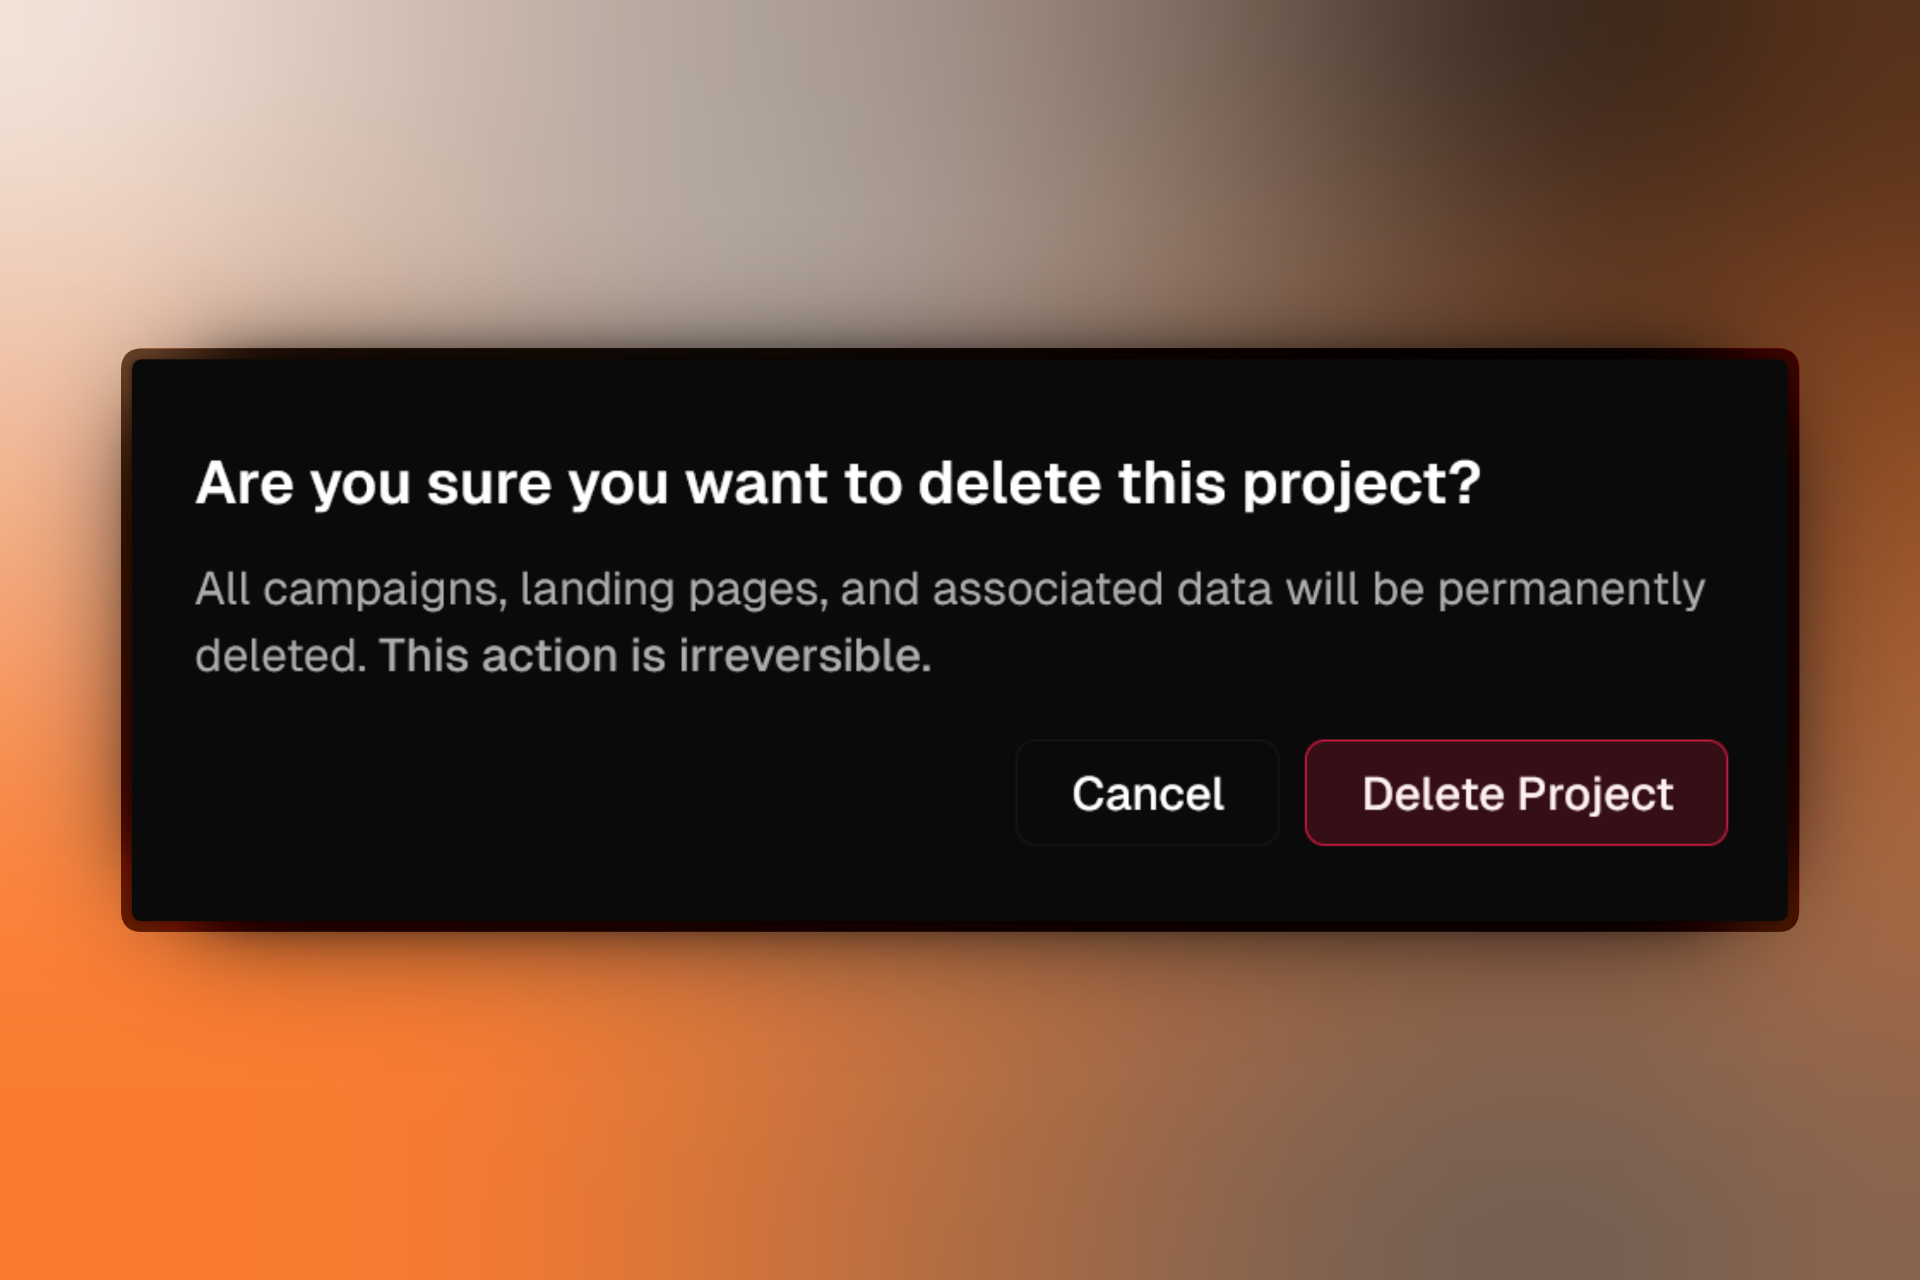
Deleting a project immediately frees up a slot toward your project limit, allowing you to create a new project.