Creating Projects
Learn how to create new projects to organize your campaigns and landing pages.
Create projects to organize your campaigns, landing pages, and marketing assets within your workspace. You can create projects from multiple locations within Firebuzz.
The number of projects you can create is determined by your subscription plan. Check Project Limits for details.
From the Project Selection Screen
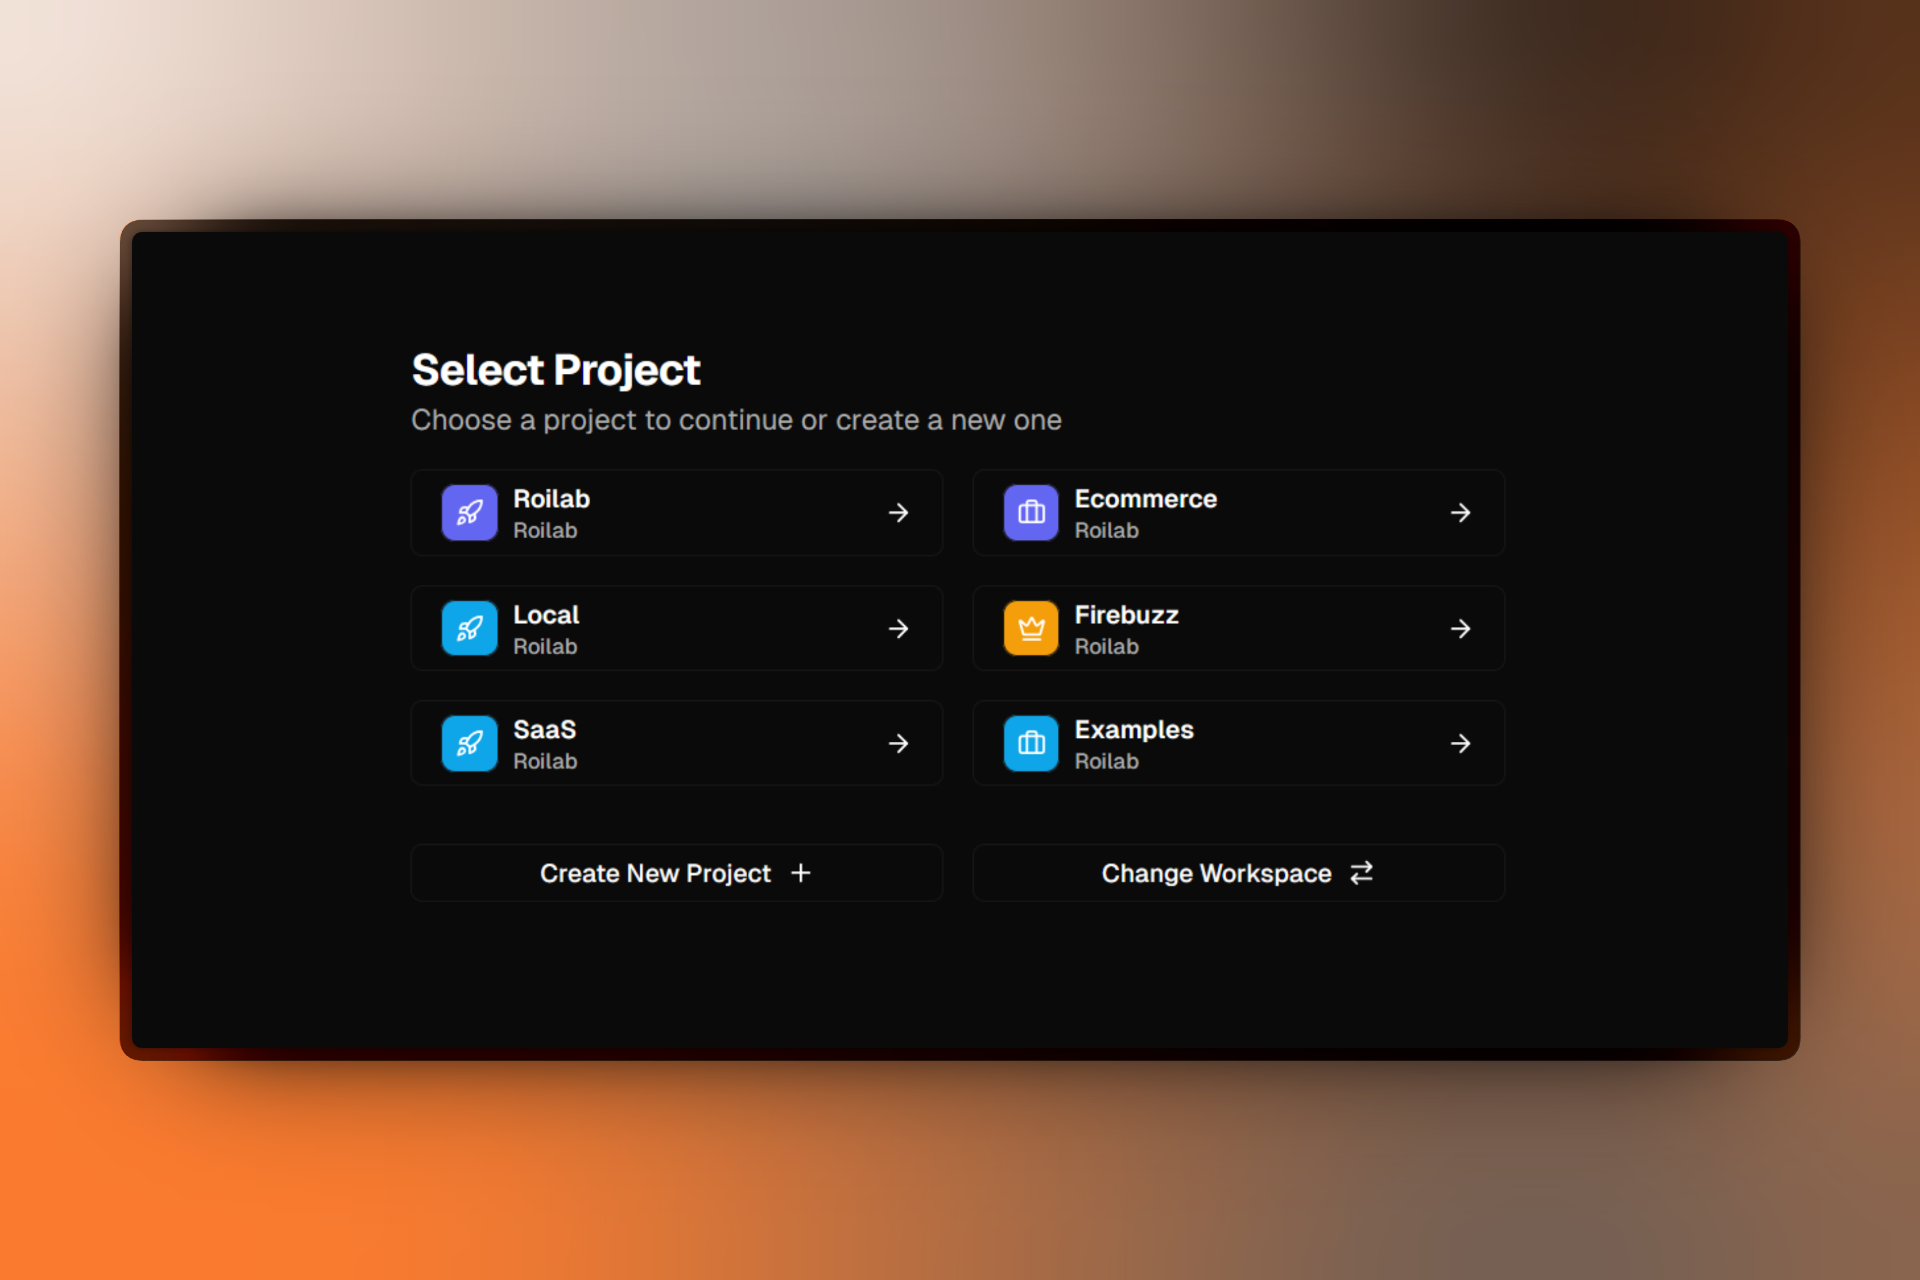
The most common way to create a project is from the project selection screen:
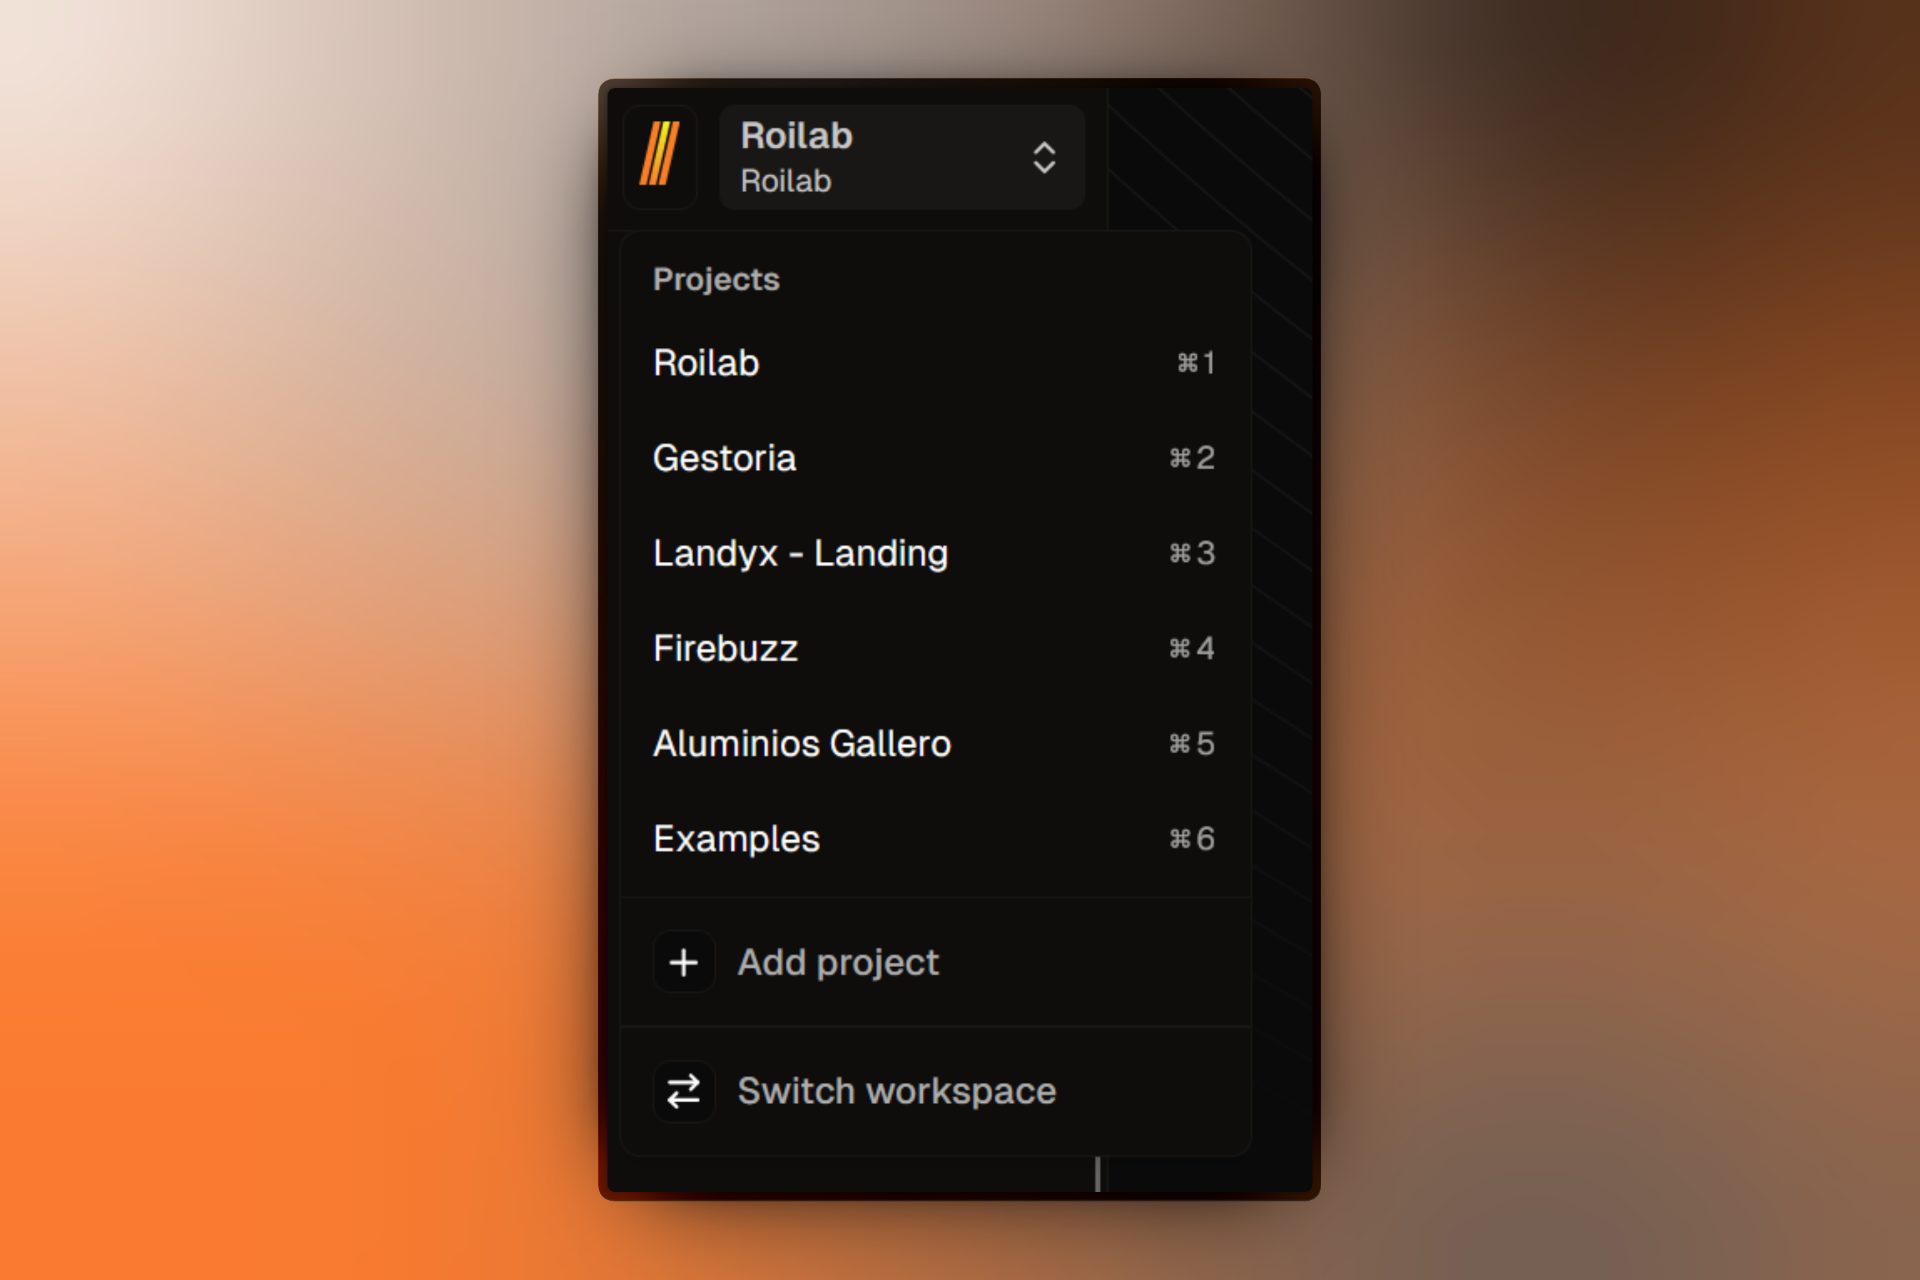
- Open the project switcher at the top of the sidebar.
- Click Add project to go to the selection screen.
- Click Create New Project.
- Fill in the project details (see below).
- Click Create Project.
You can also navigate directly to the project selection screen at /select/project.
From Workspace Settings
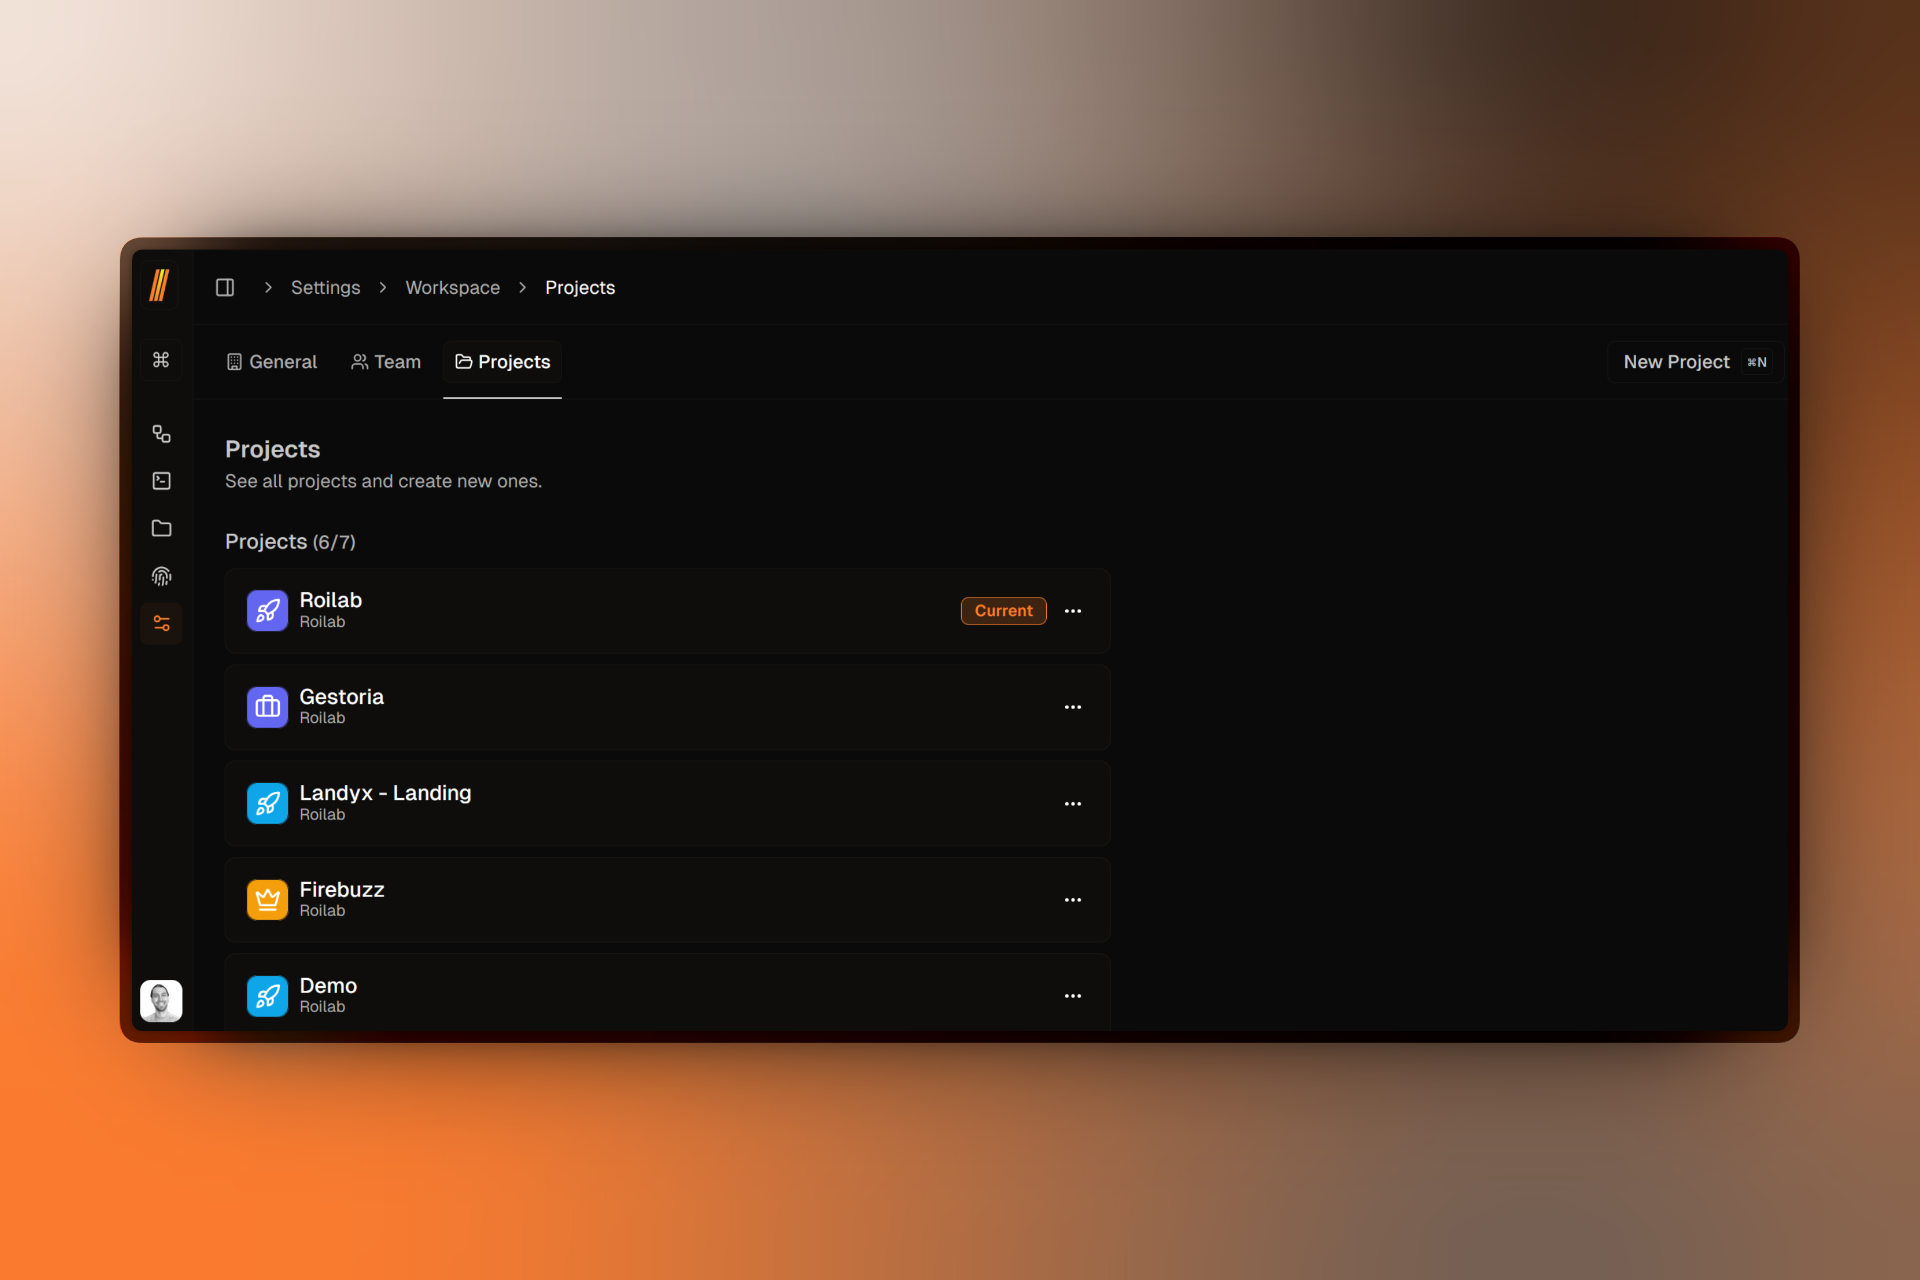
You can also create and manage projects from your workspace settings:
- Go to Settings.
- Select the Workspace tab.
- Click the Projects section.
- Click Create New Project.
Project Configuration
When creating a project, you'll configure the following details:
Title
Title:Give your project a clear, descriptive name (e.g., "Q4 Marketing Campaign", "Product Launch 2024").
Visual Identity
Customize how your project appears in the sidebar and project lists:
Color
Select a color to visually distinguish this project from others.
Icon
Choose an icon that represents the project's purpose or theme.
A live preview shows how your project will appear as you make changes.
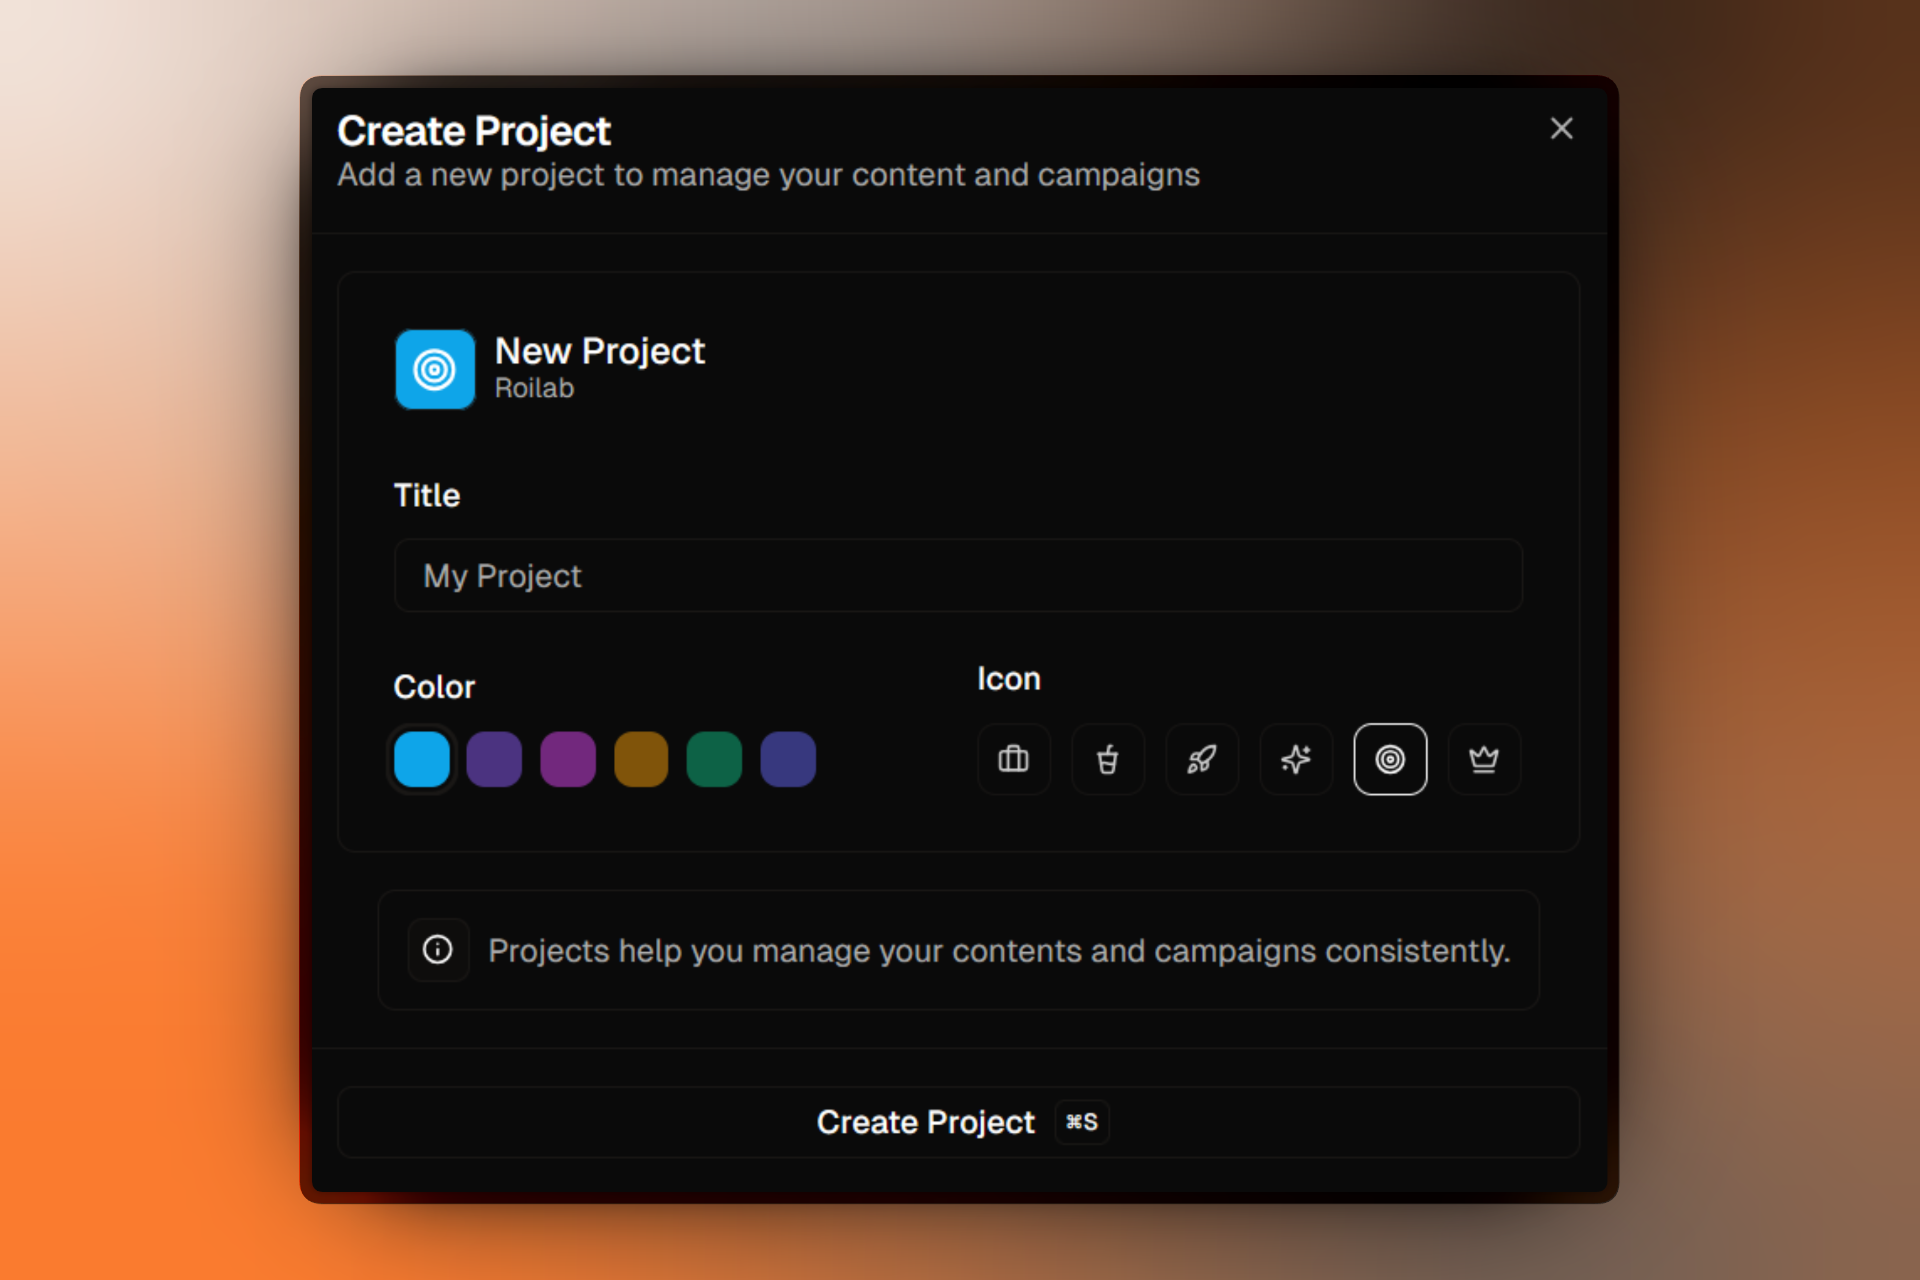
Using distinct colors and icons helps you quickly identify projects when switching between them in the sidebar.
After Creating a Project
Once you click Create Project, you'll be redirected to the project onboarding flow. This guided setup helps you configure your new project with initial campaigns and settings.